How to Paint a Stunning Landscape in Acrylics
FREE TEMPLATE
EASY ACRYLIC LANDSCAPE PAINTING
How to Paint a Stunning Landscape in Acrylics: Step-by-Step Guide
Are you a beginner looking to create a beautiful landscape painting in acrylics? Our free template and easy-to-follow instructions will help you achieve stunning results. In this step-by-step project, we'll guide you through painting a gorgeous landscape using only a few colours. You'll learn to create a compelling composition, use colour effectively, and blend easily. Follow along as we show you how to paint the sky, mountains, and terrain and help you create an acrylic painting you'll be proud to display. Download our PDF template, and let's get started!
BUY ACRYLIC PAINTLEARN MORE ABOUT ACRYLIC PAINT
Gather Your Materials for Your Seascape Landscape Acrylic Artwork
Before you begin painting your beautiful seascape landscape in acrylics, gathering all the necessary materials and preparing your workspace is essential. To protect your surface, lay down some scrap paper or a drop cloth. Here's a list of items you'll need for this project:
Derivan Acrylic: White, Phthalo Blue, Scarlet Red Light, Lemon yellow, Australian Sap Green and Ultramarine Blue.
1 X 9 x 12 inch canvas
pallet or plastic plate
jar of water
A pair of sharp scissors

Step One: Print Your Seascape Stencil and Paint the Sky
Print out the A3 stencil provided with the template to begin your seascape landscape painting. Ensure that it is the same size as your canvas. Note that this stencil will be a cut-away, so you do not have to copy or draw anything on your canvas.
Start by cutting out Section 1 of the stencil, representing the sky. Mix a large amount of white paint with a small amount of Phthalo Blue until you achieve your desired shade. This will serve as your sky colour. Carefully hold the stencil against the base of your canvas and begin painting the sky.

Step Two: Cut Out the Distant Hill Stencil and Paint with Australian Sap Green and White
After painting the sky, move on to the next section of the stencil, which represents the distant hill (Section 2). Cut it out and place it on your canvas. This section uses a combination of Australian Sap Green and White paint. Experiment with your mixing until you achieve a colour you're satisfied with. Remember that this is a distant hill, so the colour should not be too dark. Instead, aim for a light and subtle shade. Apply the paint carefully to the hill section using your stencil as a guide.

Step Three: Cut Out the Distant Water Stencil and Paint with Ultramarine Blue and White
After painting the distant hill, move on to the next section of the stencil, which represents the remote water (Section 3). Cut it out and place it on your canvas. To create this portion of the water, use a mix of Ultramarine Blue and White paint. Keep in mind that this part of the water should be pretty dark. Use your stencil as a guide and carefully apply the paint to the bottom of the canvas, starting from the stencil edge and painting up to the paint edge above.
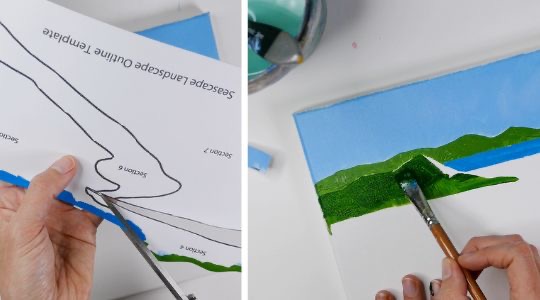
Step Four: Cut Out the Front Hill Stencil and Paint with Australian Sap Green
Now, it's time to work on the front hill. Cut out Section 4 of the stencil and place it on your canvas. Fill in this section with Australian Sap Green paint. Apply the colour carefully to the hill section using your stencil as a guide.

Step Five: Cut Out the Large Water Shape and Paint with Ultramarine Blue and White
After painting the front hill:
- Move on to the next section of the stencil, which represents the large water shape (Section 5).
- Cut it out and place it on your canvas.
- Fill in this section with a mix of Ultramarine Blue and White paint.
- Apply the colour carefully to the water section using your stencil as a guide.

Cut Out the Sand Stencil and Paint with Titanium White, Scarlet Red Light, and Lemon Yellow
The final two sections are slightly easier as they are pure colour straight from the tube. Cut away the sand (Section 6) that is next to the waters edge. Fill in this shape with a mixture of Titanium white, a small amount of Scarlet red light and small amount of Lemon yellow.

Fill in the Remaining Shape with Lemon Yellow Straight from the Tube
For the final section of the stencil (Section 7), fill it in with Lemon yellow paint straight from the tube. Apply the colour carefully to the section using your stencil as a guide. This will complete your seascape landscape painting.

Step Eight: Blend Yellow and Pinks with Titanium White and Add Waves with Straight White Paint
After completing all the stencil sections, blend the yellow and pink areas on the canvas using a little extra Titanium white straight from the tube. This will create a smooth transition between the colours.
To finish off your seascape landscape painting:
- Add little amount of straight white paint on your brush and dab the waves around the shoreline. This will add depth and dimension to your painting.
- Be careful not to add too much white and ruin the effect.
- Step back and admire your beautiful acrylic artwork!

Admire Your Seascape Landscape Painting
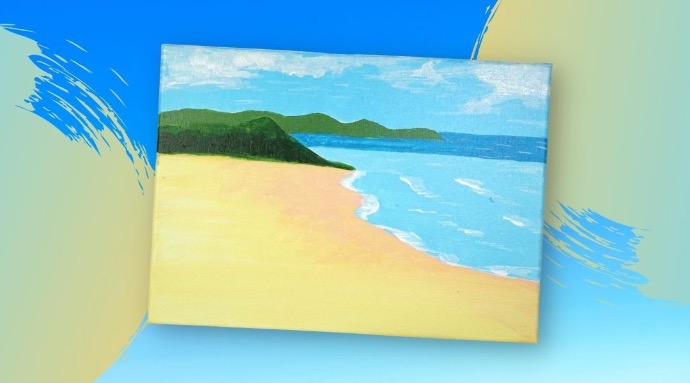
Congratulations, you have completed your beautiful seascape landscape painting in acrylics! Step back and admire your work. You now have stunning artwork perfect for your home or can be given as a thoughtful gift. Enjoy your creation's beauty, and continue developing your painting skills!