ACRYLIC PAINTING TUTORIAL
BLUE COCKATOO ACRYLIC PROJECT
Created by Artist Pauline Roods
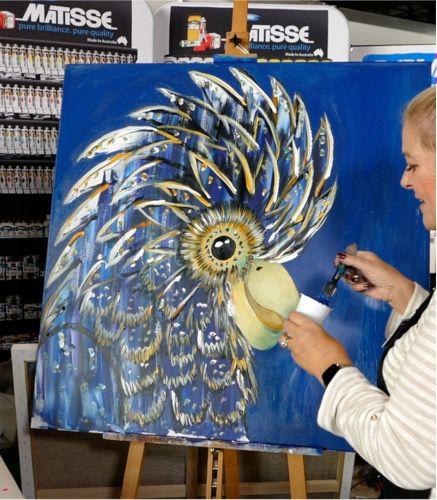
We have called this acrylic Painting tutorial Blue Cockatoo Acrylic Project because when the sun shines on black cockatoos, they have a beautiful blue gloss to their feathers. This straightforward design that Pauline has created for you is for anyone who thinks they can't paint. If you follow the steps below, you will be on your way to creating your Blue Cockatoo masterpiece.

In this project, you will be using Derivan Acrylic paint. This paint is especially suited for graphic-style art projects where ease of use, paint consistency, fast drying time and subtle semi-matt finish can produce professional results at any level of expertise.
This step by step project is so effortless to follow. We have provided a downloadable template of the design that artist Pauline Roods has designed for you - so all you need to do is trace it off, and follow the instructions below
YOU WILL NEED:
Derivan Acrylic Purple, Ultra Blue, Titanium White, Raw Sienna Carbon Black
1 X 30 X 40 cm canvas
STEP 1
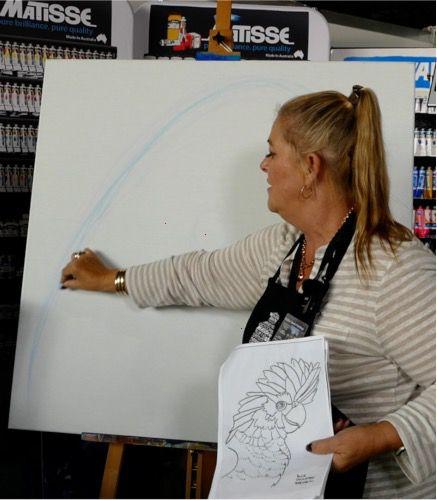
The first mark on your blank canvas is using kids chalk; draw in the shape of the outside line of the cockatoo. Use the template as a guide, don't worry; this only needs to be a rough shape of where you think your cockatoo will sit on the canvas. Drawing the outline of the cockatoo on the canvas will help you know where to put your paints down in the next step
STEP 2
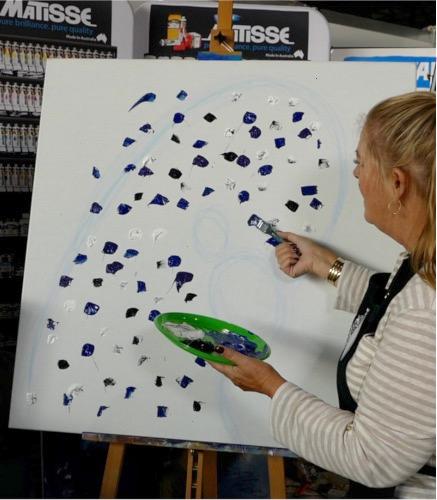
Using your Derivan 50mm brush fill the shape you have just drawn with dots of paint. * hot tip - Be generous with the paint and have an even split of Purple Titanium White, Ultra Blue and Carbon Black
STEP 3
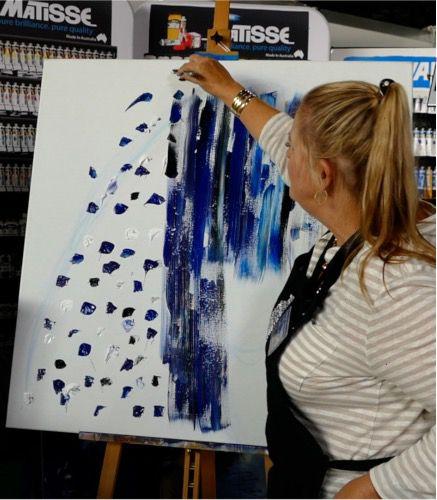
Using the 50mm flat brush, pull the dotted paint down the canvas. What you are doing is slightly blending, making streaks or stripes. *hot tip don't over blend. You are not mixing the paint; you are just dragging the colour across the surface. Make sure you don't leave any of the canvas showing in this step.
STEP 4
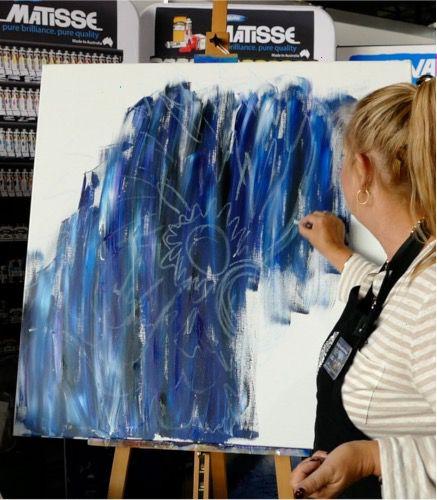
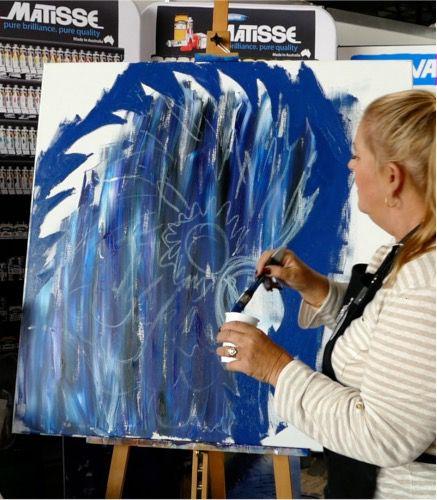
Once this layer is dry, grab your chalk stick. Using the template chalk, trace the cockatoo design with feathers over the painted shape you have created.
STEP 5
In this step, you are going to block out the background. Mix up the Purple titanium white with the ultra-blue and a dash of black to create a blue-grey background. Use your 25mm brush for the detail and your 50mm flat brush for the more prominent areas - This will help you define the shape and feathers of your cockatoo *hot tip you will need to do two coats.
STEP 6
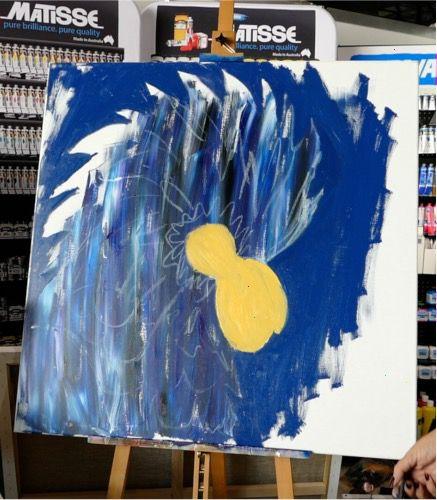
Use a mix of Raw Sienna and white paint to paint in the eye and beak shape. You don't have to be too exact as you can define this shape as you go. The beauty of acrylics is if you are not happy with the shape, you can continually refine it by going over the edges with your blue mix from step five.
STEP 7
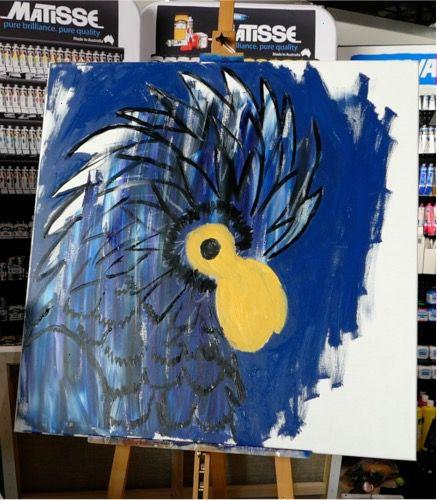
Using your 25mm flat brush, outline the feathers and eye with the carbon black. It does not have to be perfect in fact, it looks more interesting if the line is uneven. If you look at the following steps, you will be adding more layers to this line work.
STEP 8
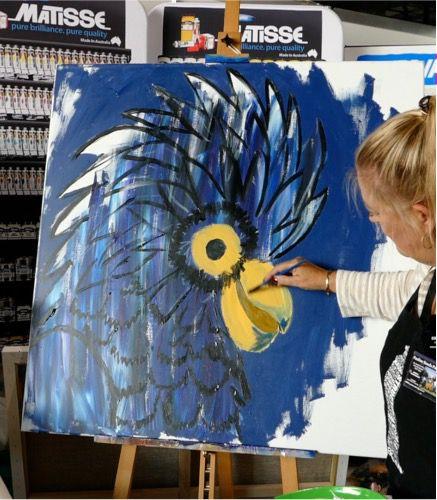
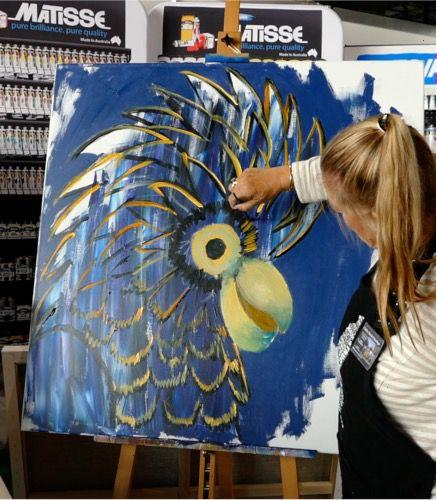
Use ultra blue on the tip of the beak and blend with the sienna/white mix, pull the ultra blue into the upper beak to create highlights and shape to the beak. Repeat on the bottom beak and between the beak and eyes. This will define the eye and nose area, blend a little white paint to the lower part of the top beak and blend a bit of straight raw sienna and a touch of black to the inside of the mouth. This will create dimension. Use this photo as a reference.
STEP 9
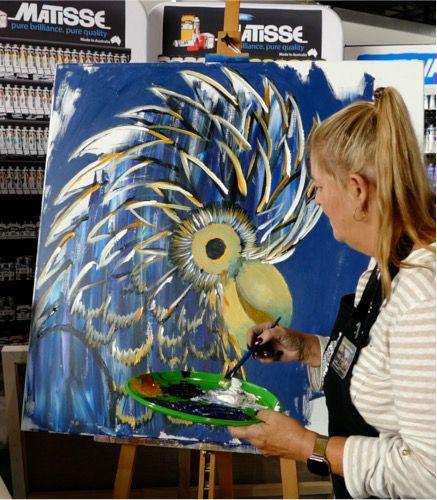
Now we will work on the feathers and the eye. Use the yellow ocher to paint the feathers again. It does not have to be perfect leave parts of the black line visible - this makes the linework more interesting. Have a look at how Pauline has applied this layer use this as your guide.
STEP 10
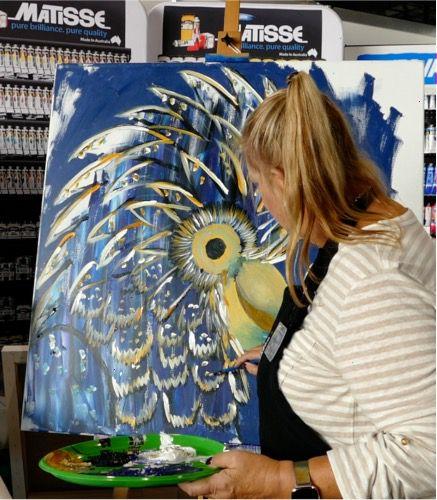
Repeat step ten using the white to repeat what you have done with the feathers tracing the outlines again don't be exact. And on the head only paint on the top of the feathers. Make sure to put some soft flicking feathers at the top of the beak into the head feathers, between the beak and eye and along the lower part of the beak from the eye joint to the chin.
STEP 11
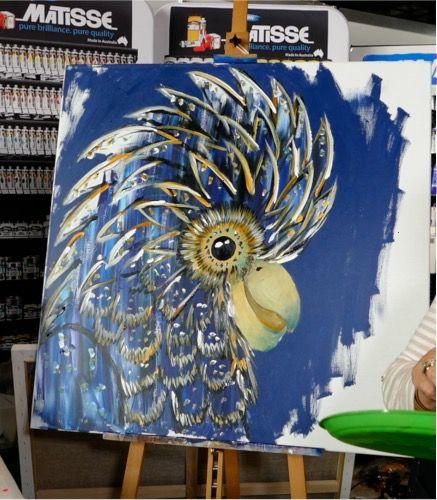
Step 12 will find you popping in some white dots on the feathers this helps gives the viewer more information about the feathers it gives the impression of texture and reflection.
STEP 12
You are almost there, now it is time to finish off the eye with white dots. this dot on the eyeball this gives you the impression of reflection. Loosely load your 25mm brush with the white, yellow ocher and black to create the dots around the eye.
STEP 13
You are now on the home stretch; you need to finish off your background and sign your work ready for hanging. Now you to start thinking about what your next artwork will be.
Are you looking for inspiration? Whatever your skill level Pauline Roods has designed Step-by-step examples to walk you through your next masterpiece. Have a look here.