CAT FACE PAINT DESIGN
Do you want to do a cat face paint design? While some face paint designs can look complicated and time-consuming, with some practice and the correct instructions, anyone can do it! Thanks to Derivan, you have access to all the tips and tricks you might need to make a fantastic cat design that anyone can try. Even if you're entirely new to Face painting or art in general, or you're familiar with it and just need to refresh your memory, this guide is what you need to create the perfect cat design.
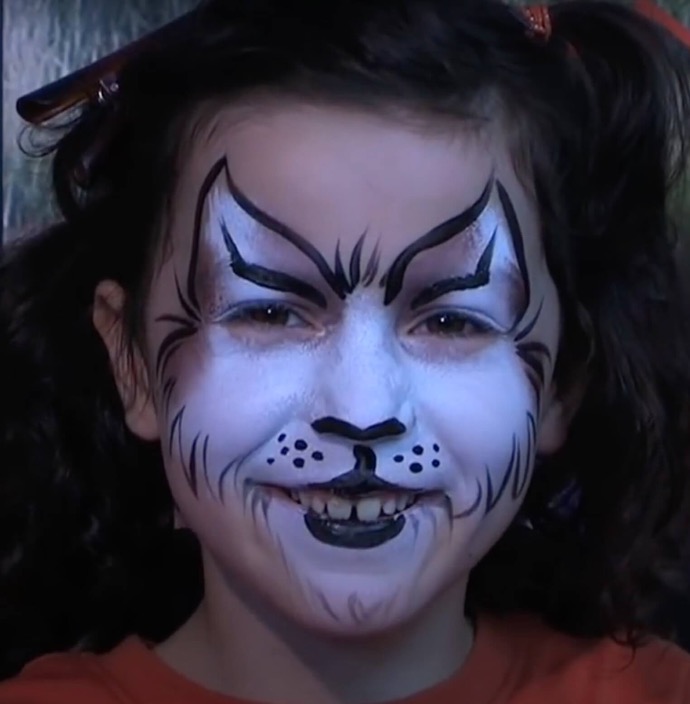
YOU WILL NEED
Before starting your Cat face paint design, ensure you have all the necessary supplies.
- A clean, well-lit workspace
- A disposable surface to protect your workspace
- A mirror for easy visibility
- Smock or apron to protect your clothes
- Disposable gloves for cleanliness
OR
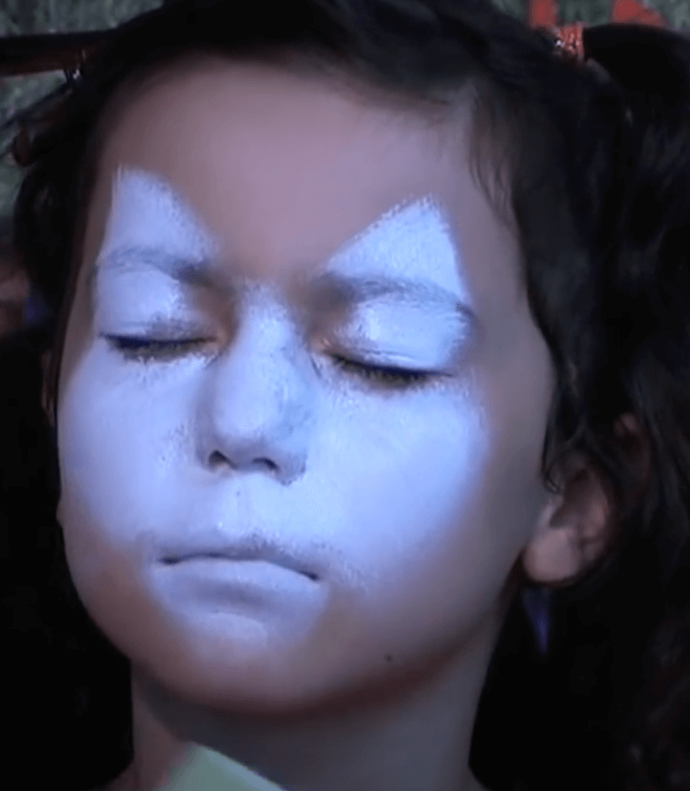
STEP ONE | PAINT THE CAT SHAPE IN
Using a sponge and white face paint, Start putting in your cat design. Using the sponcer sponge dab a cat design onto the face, specifically creating triangular shapes above the eyes to make the design visible and stand out against skin tones.
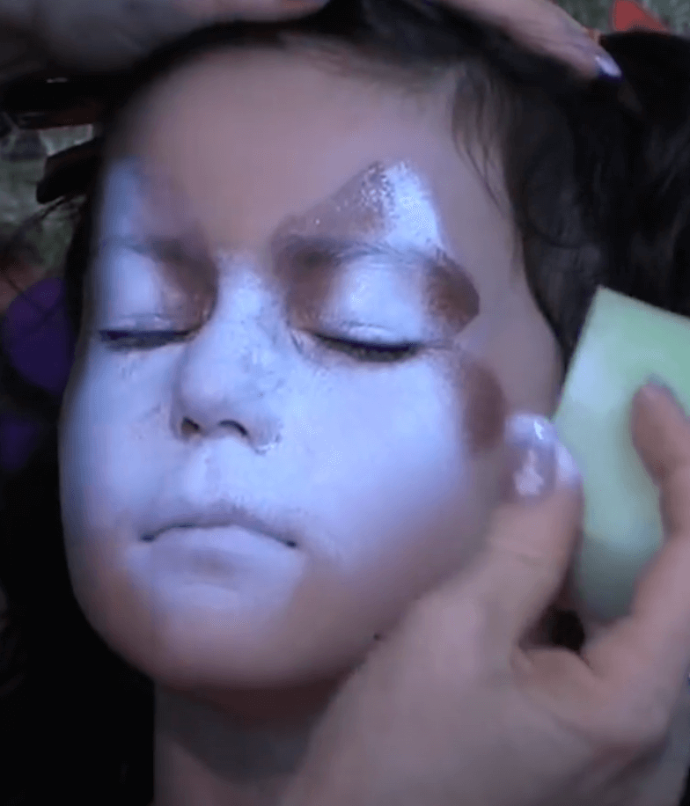
STEP TWO | ADD THE CAT'S BROWN STRIPES
Using the smaller sponge load with a small amount of brown face paint. You are putting your cat markings in now, so do this lightly on either side of the eye and the top of the cheek to get the appearance of the cat's fur.
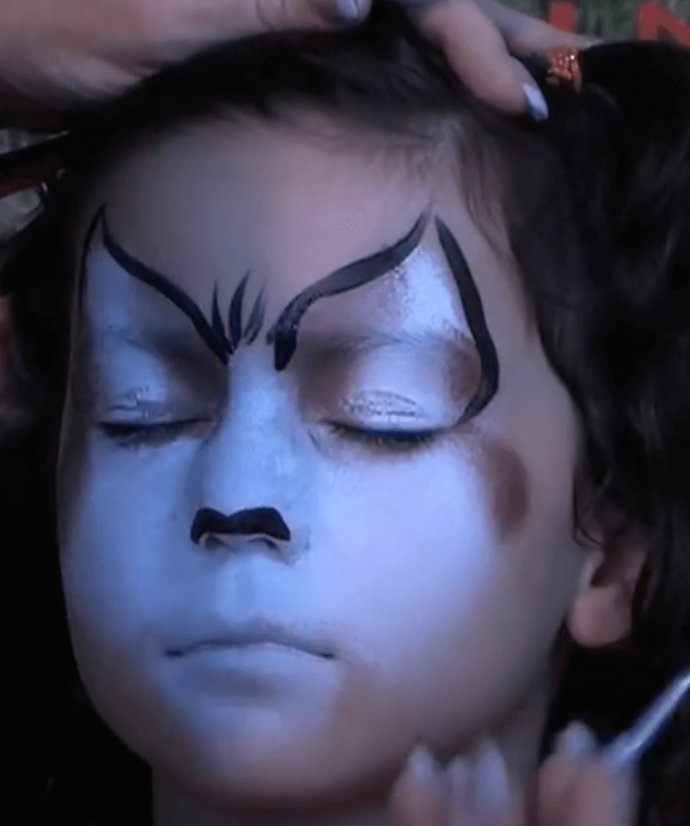
STEP THREE | PAINT THE CAT EARS
Using a round brush from the face paint brush set loaded with black face paint, create long smooth strokes to outline the triangle shapes created with the sponge, and shorter upward strokes between the eyebrows to create small hair lines.
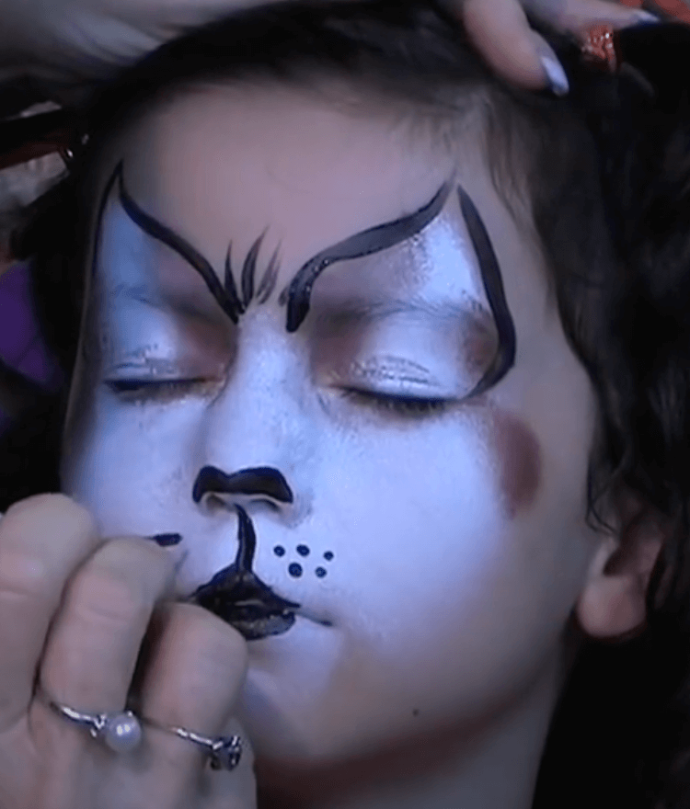
STEP FOUR | PAINT CAT NOSE AND MOUTH
Using this same loaded round brush, paint the tip of the nose, the lips, and then paint a line connecting the two. Then, dot small freckles around the area with this same colour.
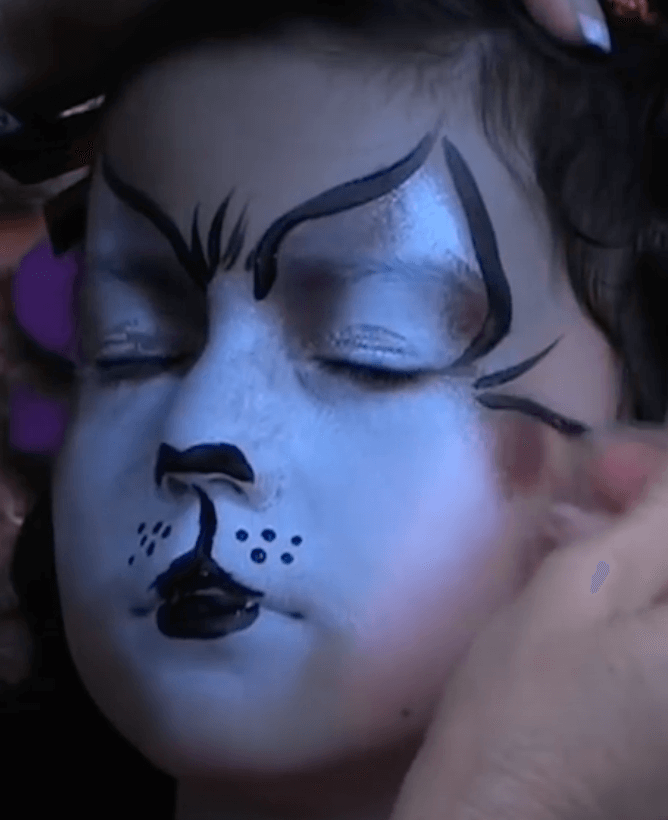
STEP FIVE | PUT THE CATS WHISKERS ON
Using the same brush and paint, outline long strokes towards to hairline from the top of the cheeks to create whiskers.
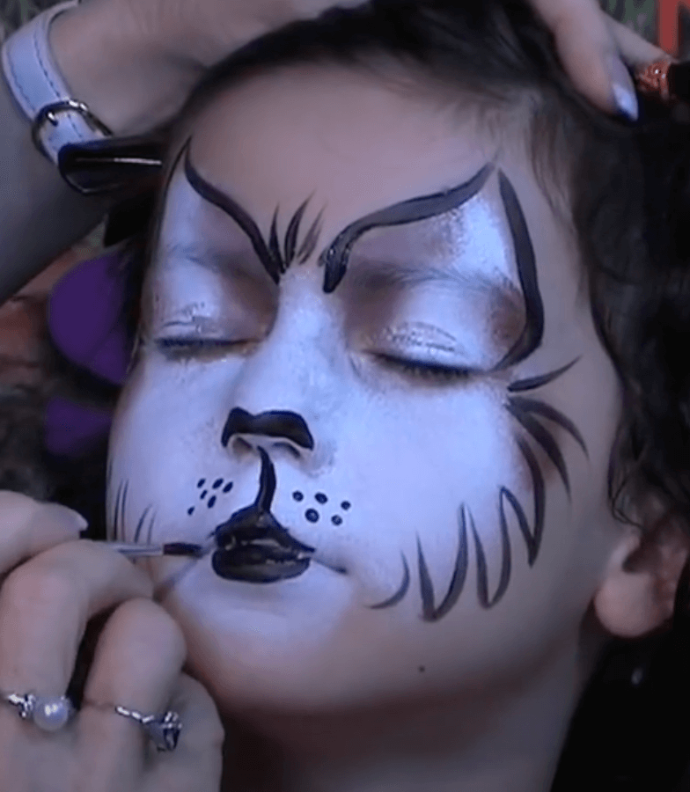
STEP SIX | PAINT IN THE CAT FUR OUTLINE
Around the edge of the white base, draw curved lines as shown to create fur around the edge of the face.
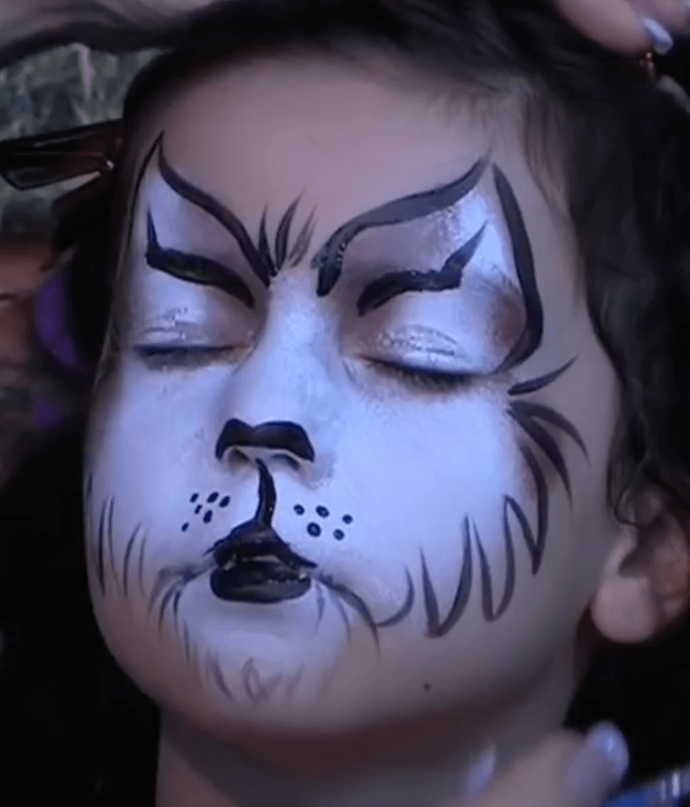
STEP SEVEN | CATS CHIN FUR
Repeat this process around the bottom of the chin using smaller strokes, and coming from the corners of the mouth. Then, paint strokes that follow the shape of the eyebrow and then upwards.
Tips to make your next Cat face paint design even better
There are plenty of ways to improve your next cat face paint design. For example, if you’re creating a cat design for a child, you should make the ears oversized to make them appear cuter.
Practice your Cat designs
As you can see, creating a cat face paint design isn’t difficult, but it does take some practice. If you follow the tips and steps outlined in this guide, you’ll be a pro in no time. With a bit of practice, you’ll be able to easily create cute cat face paint designs.
