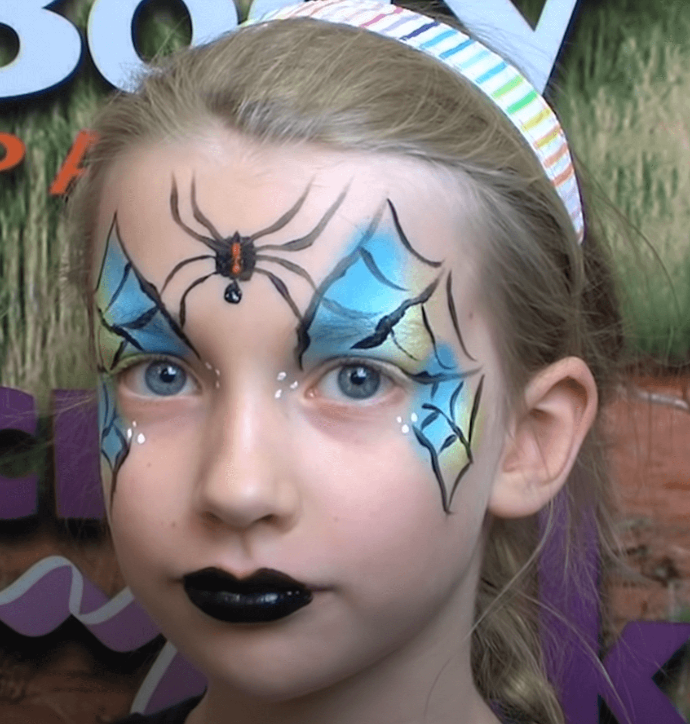
WITCH FACE PAINT DESIGN
This Witch design is perfect for a spooky costume or just some fun practice for face paint. Many artists, including face painters, master their artworks with practice and skill, and many face paint designs may be complex and intricate, however, this guide allows everyone, despite their experience, to be able to create the perfect witch design with tips and tricks that make it easy.
YOU WILL NEED
Before starting your witch face paint design, ensure you have all the necessary supplies.
A clean, well-lit workspace
A disposable surface to protect your workspace
A mirror for easy visibility
Smock or apron to protect your clothes
Disposable gloves for cleanliness
You're ready to begin when you’re sure you have all the necessary tools!
STEP ONE | PREPARING YOUR SPONGE
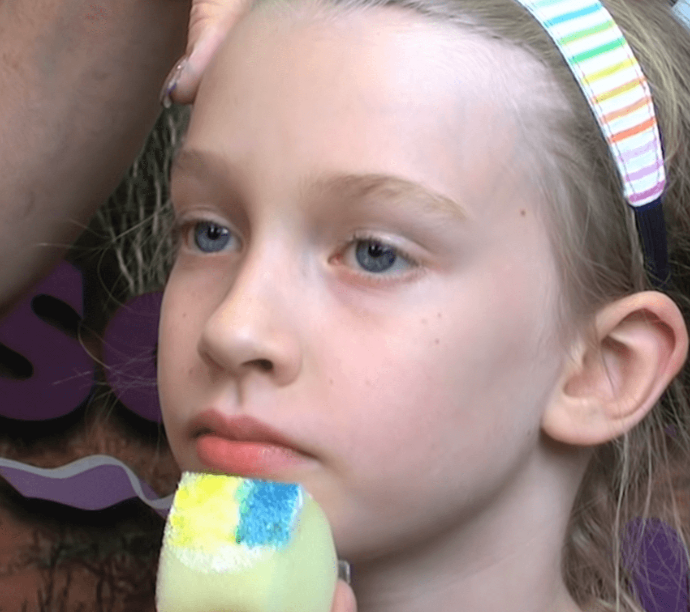
First, load your sponge with white Derivan face paint, then on top of this white base, add blue Derivan face paint one of side,and a stripe of yellow Derivan face paint next to each other, as shown.
STEP TWO | WITCHY WING COLOURS
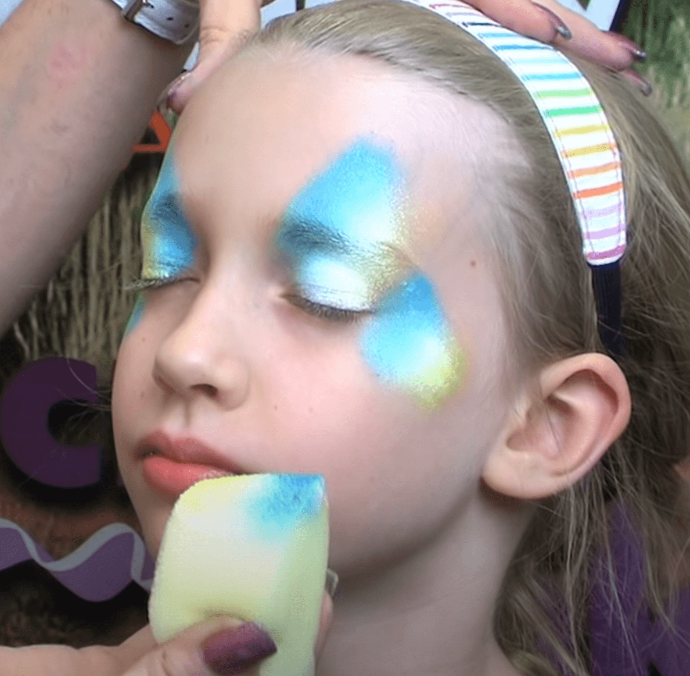
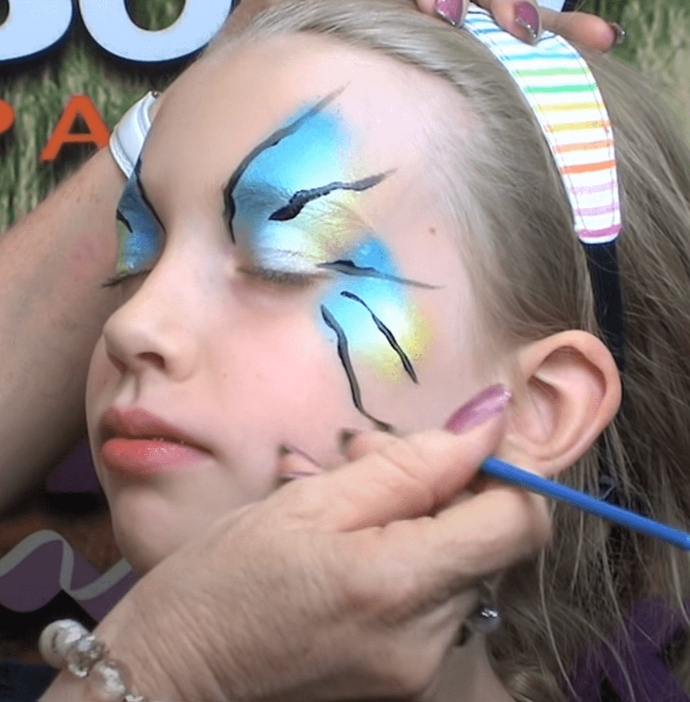
Using this prepared sponge, gently dab the paint over the eye area and eyebrows, with eyes closed. Be sure to keep the sponge facing the same way and dab repeatedly to achieve soft gradient between the colours. Repeat this process below the outer eye area to create a butterfly wing shape
STEP THREE | WEB OUTLINE
Load a round brush with black Derivan face paint and create wiggling lines on top of the yellow-blue wing shape, moving outwards from the eye towards the edges of the face.
STEP FOUR | WEB DETAILS
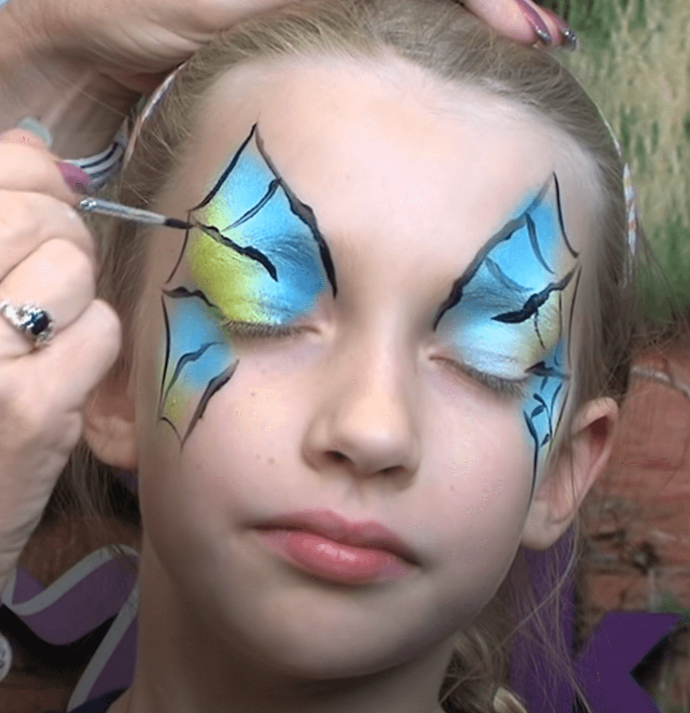
Connect these wiggly lines with short curved strokes between each of them, creating a web pattern with the black paint.
STEP FIVE | WITCHY SPIDER
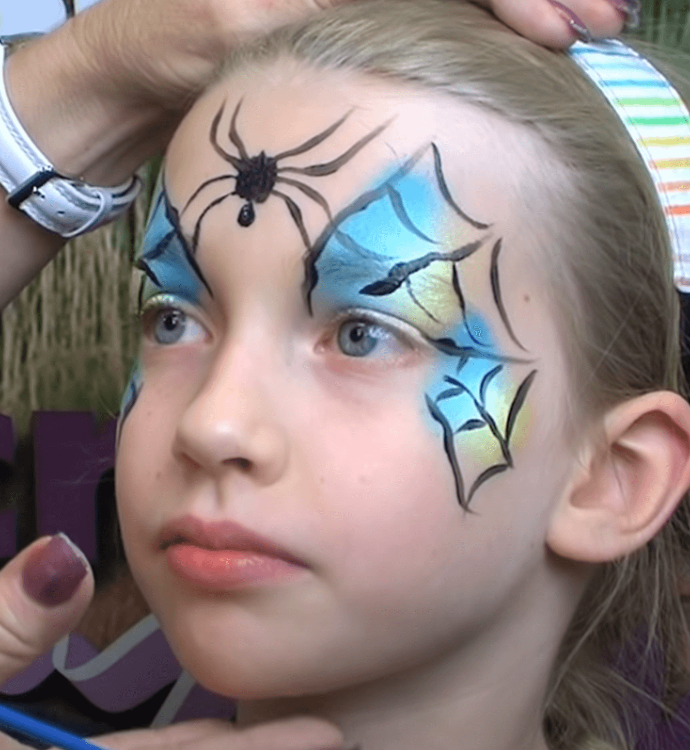
Begin by creating a small black spot on the forehead, and, above this, a larger black spot. Coming from this larger spot, or the body, create four downward curving strokes, two on each side, that start at the body and connect to the edge of the web. Then repeat this again with upward curving strokes.
STEP SIX | WHITE DETAILS
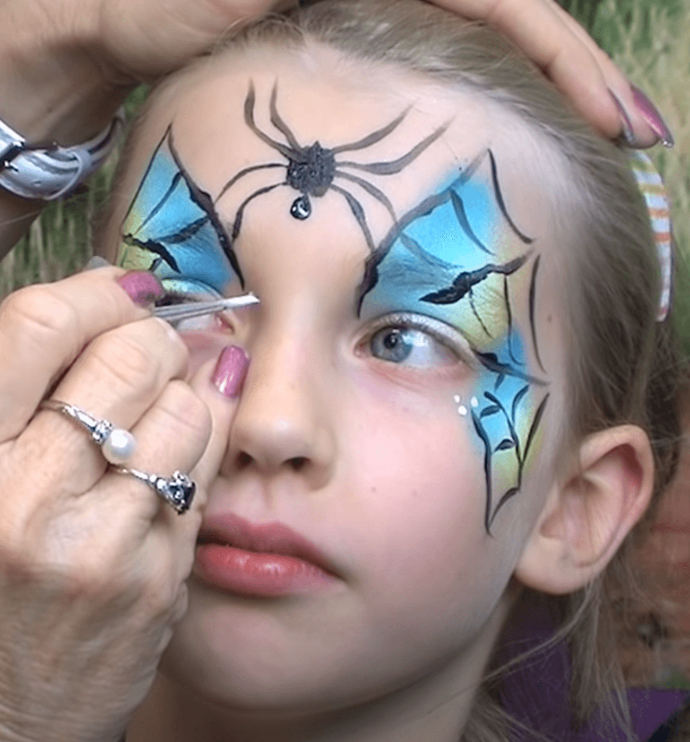
Using a round brush loaded with white Derivan face paint, dot small white freckles around the bottom of the outer corner of the eyes and on the inner corner of the eyes towards the bridge of the nose. Use this same brush and paint to add two white dots to the lower black circle on the forehead, to create eyes for the spider.
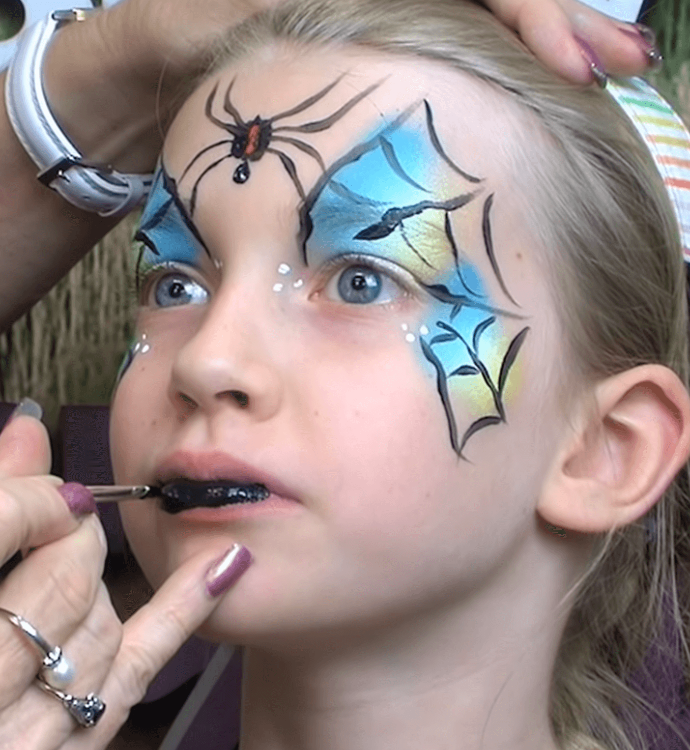
STEP SEVEN | FINAL WITCHY TOUCHES
Using a round brush loaded with red Derivan face paint, draw a vertical line down the body of the spider to add detail and interest, and then, using a round brush and a colour of your choice, colour in the lips to create a lipstick look.
Tips to make your next witch face paint design even better
There are plenty of ways to improve your next witch face paint design. For example, including more colours on the sponge makes a more colourful gradient, but can be difficult to avoid mixing the colours too much.
Practice your witch designs
As you can see, creating a witch face paint design isn’t difficult, but it does take some practice. If you follow the tips and steps outlined in this guide, you’ll be a pro in no time. With a bit of practice, you’ll be able to easily create awesome witch face paint designs.
