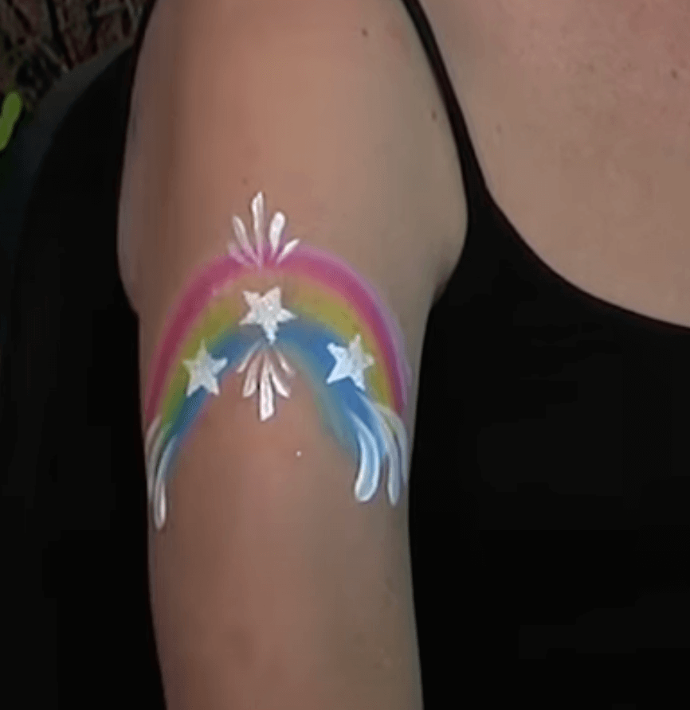
RAINBOW FACE PAINT DESIGN
This rainbow face paint design is a beautiful look for any occasion thanks to its colourful and elegant detail. This guide will help make this complex design simple, and with a little practice it will be an easy, beautiful look to create. A great aspect of this design is that it provides skills for other designs, and can be easily used to create other looks, such as a rainbow tiara or necklace, depending on you or your customers preference. This guide will provide a step by step process to recreate this look, and with a little practice you'll be able to easily create beautiful rainbow designs, and adjust them in colour, size and placement to suit you.
YOU WILL NEED
Before starting your rainbow face paint design, ensure you have all the necessary supplies.
- A clean, well-lit workspace
- Stencils Set - Girl
- Face & Body Butterfly & Flower Set.
- A disposable surface to protect your workspace
- A mirror for easy visibility
- Smock or apron to protect your clothes
- Disposable gloves for cleanliness
You're ready to begin when you’re sure you have all the necessary tools!
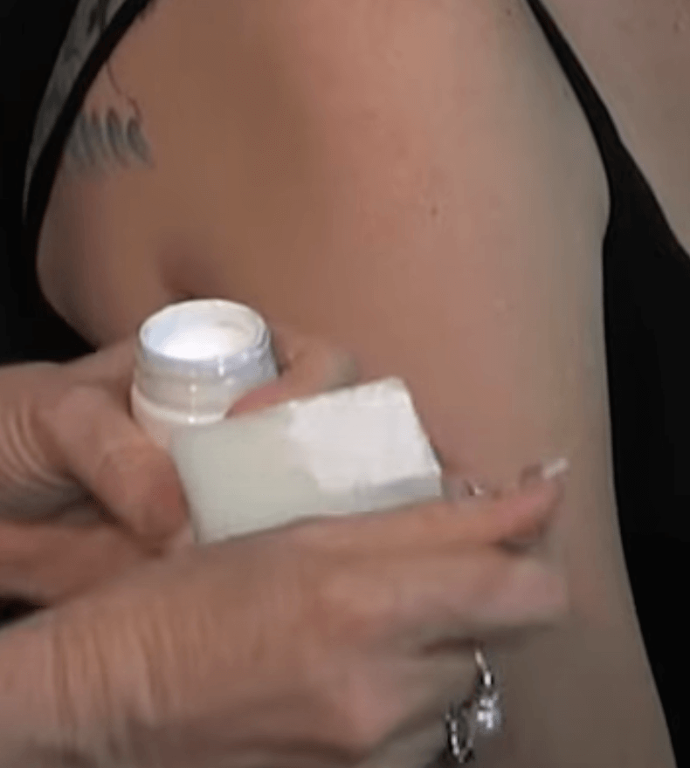
STEP ONE | PREPARING THE SPONGE PT. 1
First, begin preparing the sponge by using a brush to cover half of one side of a sponge with white paint.
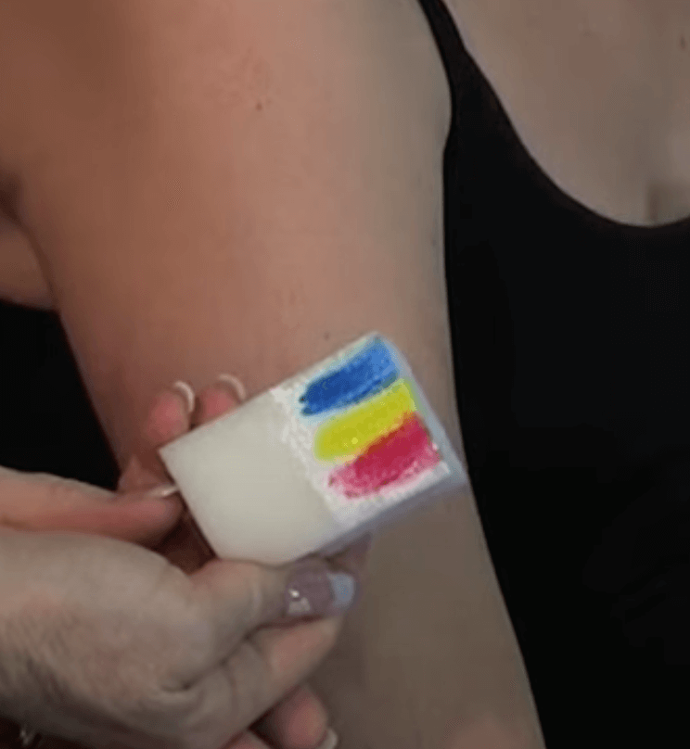
STEP TWO | PREPARING THE SPONGE PT. 2
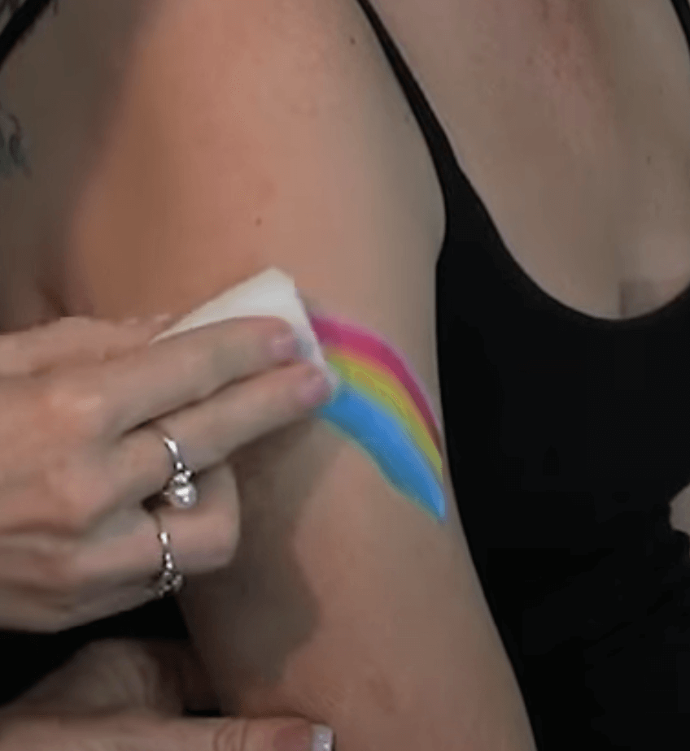
Then, over this white base, paint a central line with yellow paint, with a red line on one side and a blue line on the other.
STEP THREE | RAINBOW BASE
Use this sponge to create the base rainbow shape by dragging it lightly across the area in which you want the rainbow, ensuring the sponge is moving in the same direction as the lines on the sponge.
STEP FOUR | STARS
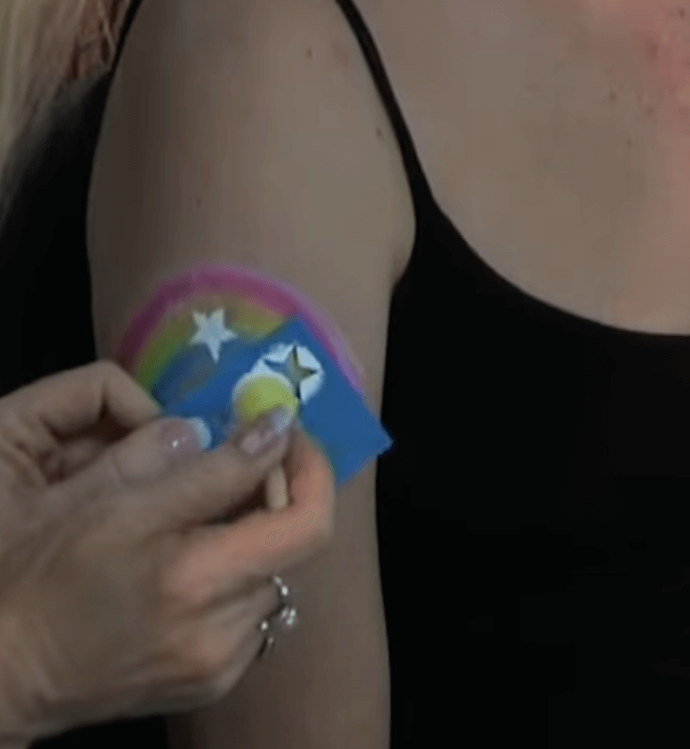
Using a Derivan stencil and a spouncer or sponge, position the star stencil at the centre of the rainbow and dab white paint over it to create the star shape. Repeat this twice more, once on each side of the central star.
STEP FIVE | WHITE DETAILS
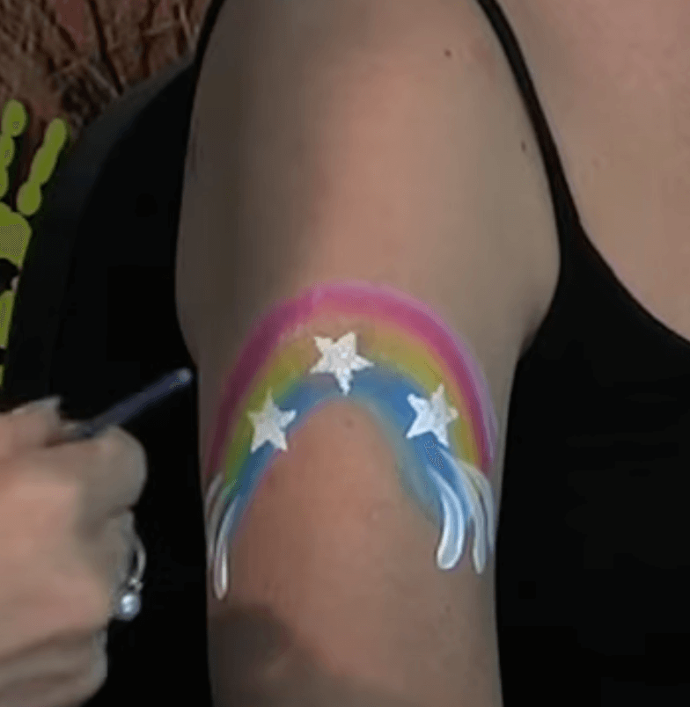
Using a round brush loaded with white paint, create three short strokes that curve inwards towards each end of the rainbow, making three on each side. When creating each stroke, apply more pressure at the beginning of the stroke and then release this pressure to create a thinner end for each line.
STEP SIX | FINISHING TOUCHES
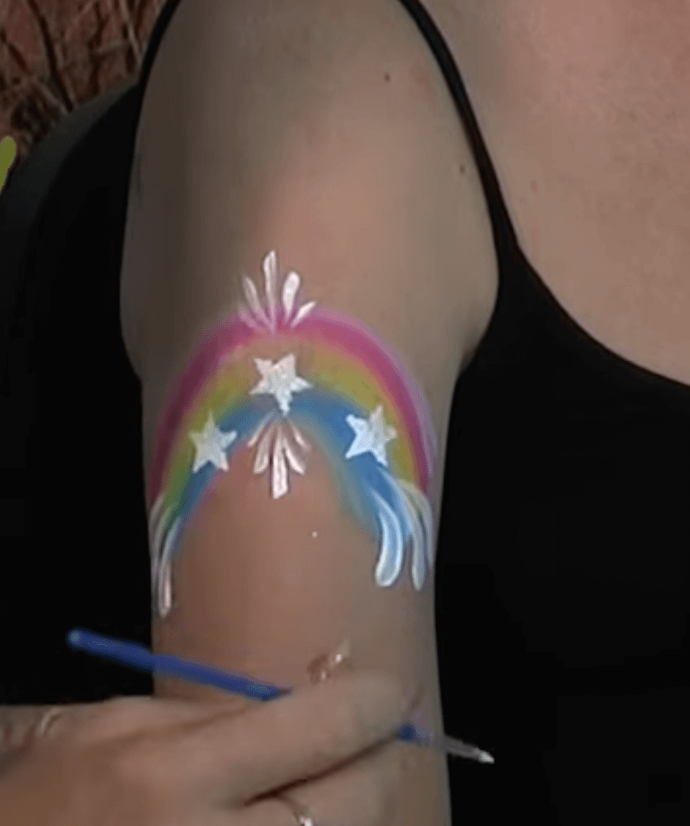
Using the same technique outlined above, create short strokes above and below the central star, moving inward toward the star and creating tapering lines by using the pressure technique.
Create five lines above and five lines below the central star, with the central lines being the longest, the next two lines on either side being slightly shorter, and the outermost lines being the shortest.
Tips to make your next rainbow face paint design even better
There are plenty of ways to improve your next rainbow face paint design. For example, you can create this design on a forehead or face to create a really cool tiara look.
Practice your rainbow designs
As you can see, creating a rainbow face paint design isn’t difficult, but it does take some practice. If you follow the tips and steps outlined in this guide, you’ll be a pro in no time. With a bit of practice, you’ll be able to easily create beautiful butterfly face paint designs.
