TIARA FACE PAINT DESIGN
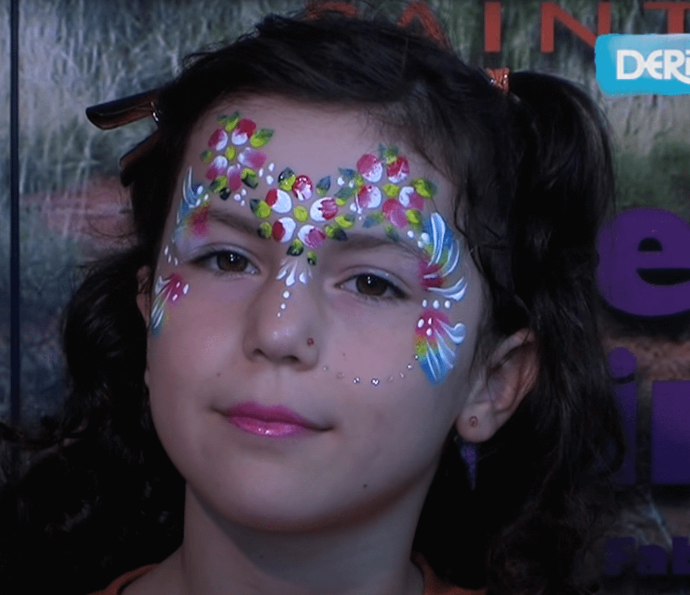
This beautiful tiara incorporates rainbows, flowers and elegant techniques to create a detailed design that, despite looking professional, can be achieved by anyone with a little practice. This design can be perfect for any occasion, including halloween or carnivals, and is perfect for everyone, whether face painting is your profession or you've never painted before. This guide will include tips and tricks for everyone to create the perfect floral tiara look with ease and enjoyment.
YOU WILL NEED
Before starting your tiara face paint design, ensure you have all the necessary supplies.
- A clean, well-lit workspace
- Face & Body Butterfly & Flower Set.
- A disposable surface to protect your workspace
- A mirror for easy visibility
- Smock or apron to protect your clothes
- Disposable gloves for cleanliness
You're ready to begin when you’re sure you have all the necessary tools!
STEP ONE | PREPARE THE SPONGE
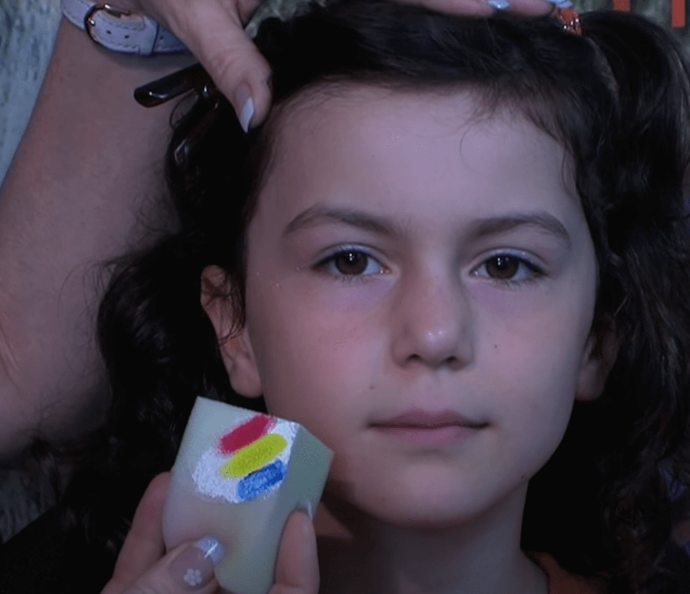
prepare the sponge by applying white paint onto it, then applying a red, yellow and blue stripe next to each other, over this white paint, as shown in the picture.

STEP TWO | DAB ON WINGS
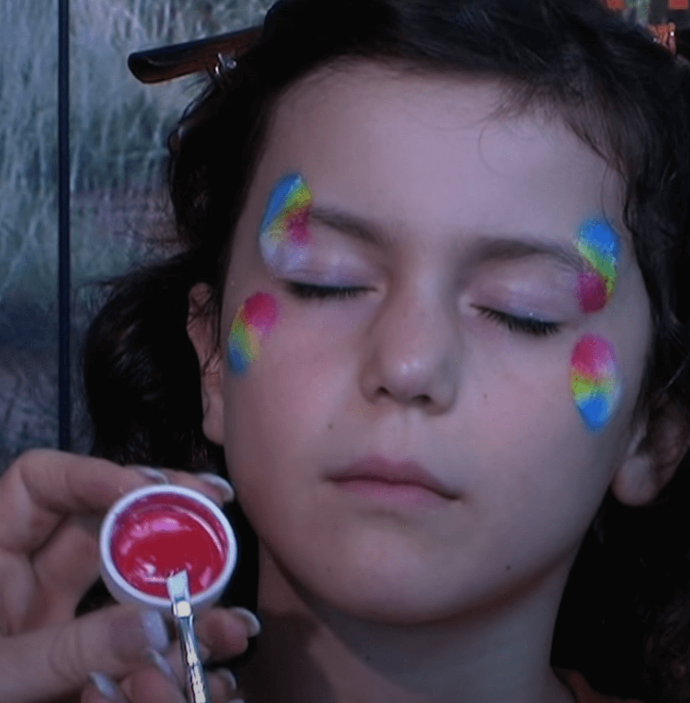
Use this prepared sponge to dab on a rainbow design above and below the outer corners of both eyes, creating a shape similar to a butterflying on either side. Make sure to dab repeatedly to gently blend the colours into a gradient.
STEP THREE | PREPARE THE BRUSH
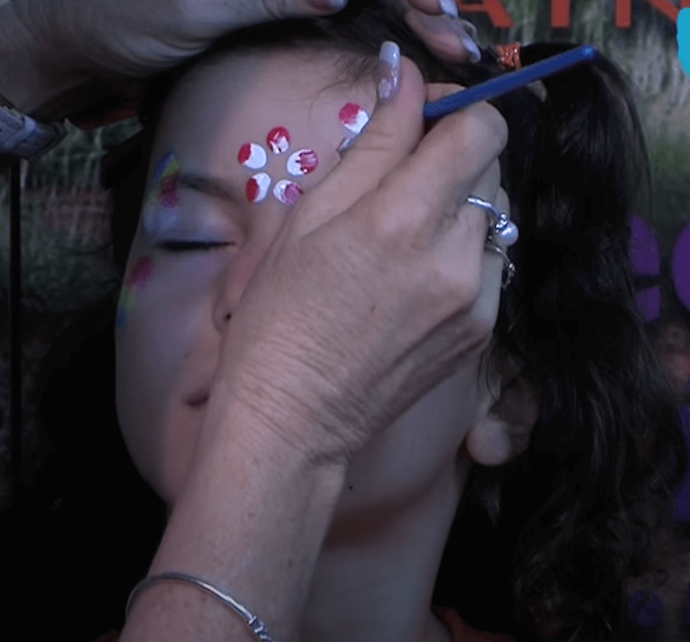
Double load a chisel brush by first covering the brush in white paint, and then dipping the tip into red paint. Make sure to avoid mixing the colours together while dipping the tip of the brush.
STEP FOUR | CREATE THE FLOWERS
Use the double loaded brush to create petal shapes by pressing in flat onto the skin and then removing it. To create the flower, repeat the petal making process five times in a circle in the centre of the forehead, just above the eyebrows. Ensure the red tip of the brush remains facing outwards from the centre of the circle.
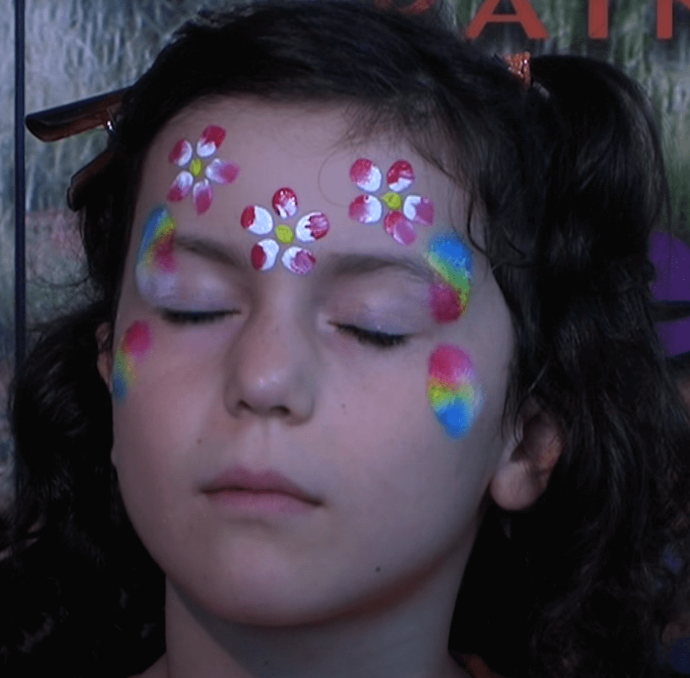
Repeat this process twice more on either side of this central flower, raised slightly above the eyebrows.
STEP FIVE | YELLOW DETAILS
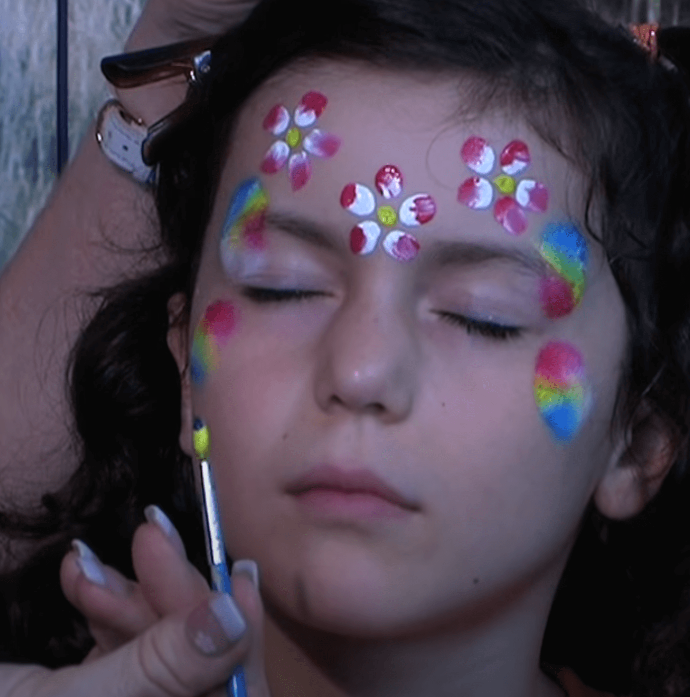
Use a round brush and yellow paint to create small dots at the centre of each flower to add extra detail.
STEP SIX | PREPARE THE BRUSH
Repeat the double loading process used earlier for the flowers, but this time load a round brush with yellow paint first, and then dip it into the blue paint.
STEP SEVEN | CREATE THE LEAVES
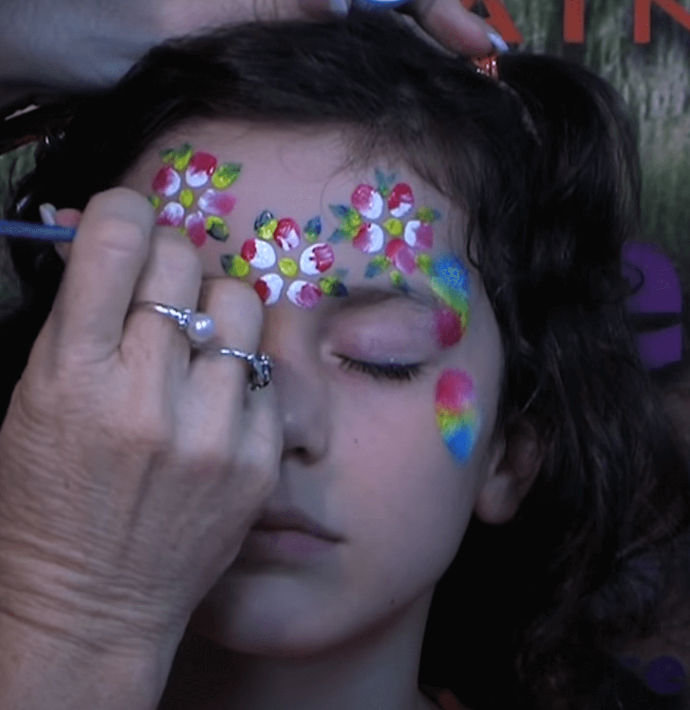
Use this double loaded round brush to create leaves with the same technique used for the petals, filling in the spaces between flower petals on the forehead. Make sure to keep the blue tip of the brush facing away from the centre of the flower it is closest to, to give the design a finished and flawless look.

STEP EIGHT | WING DETAILS
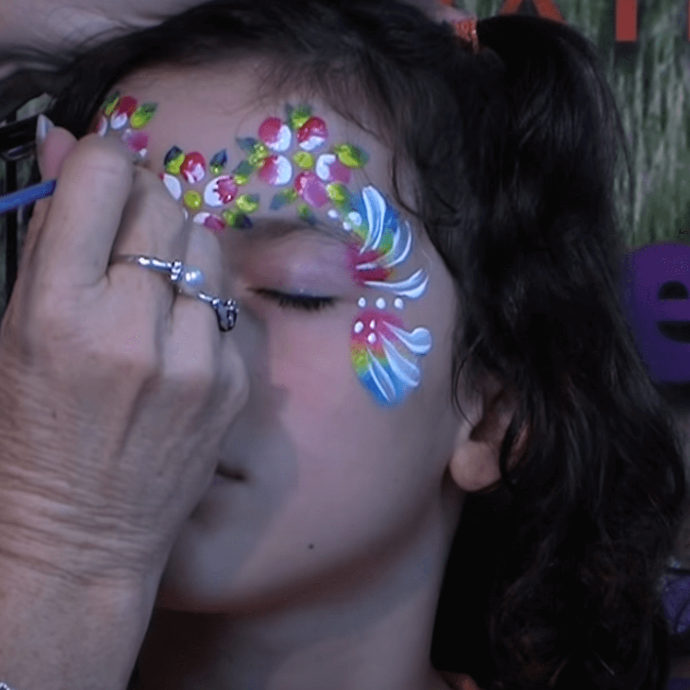
Using a chisel brush loaded with white paint, create curved strokes over the sponged rainbow area, moving inwards from the outer edge of the face towards to outer corner of the eye. On each of the four sponged areas create three curved strokes.
For extra complexity and an interesting detail, release the brush slightly towards the end of the stroke to create a thinning line. This extra aspect can add a more finished and elegant look.
STEP NINE | WHITE DETAILS
Using the round brush loaded with white paint, fill in spaces and empty areas between the white strokes, petals, leaves and flowers, or anywhere on the design that may need some extra detail by simply making three or four small dots of white paint.
STEP TEN | NOSE DETAILS
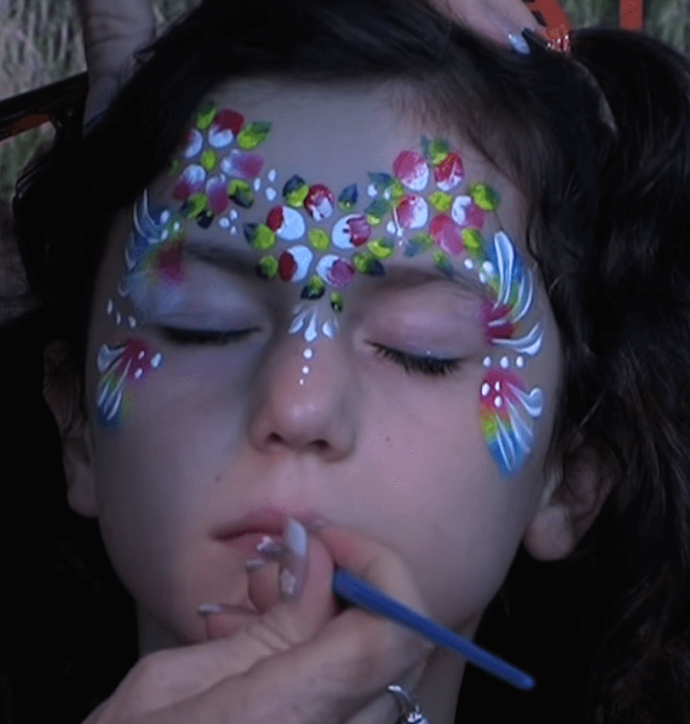
By using the techniques outlined in the last two steps, fill in the bridge of the nose with tapering strokes going upwards towards the central flower, and small white spots down the bridge of the nose.
For extra detail, reduce the size of the dots as you move down the nose, creating flow through the design and a more elegant look.
STEP ELEVEN | FINISHING TOUCHES
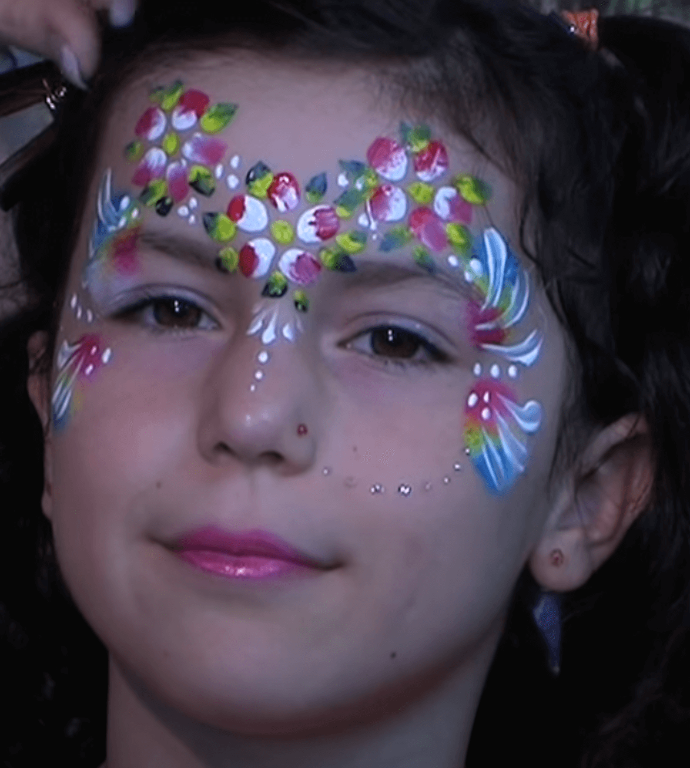
Using a round brush and a mixture of red and white paint, you can fill in the lips to create a lipstick look.
To finish off the design, you may use Derivan Kindy Glitz to add extra sparkle to the design, for example making sparkly face jewellery, as seen in the picture.
Tips to make your next tiara face paint design even better
There are plenty of ways to improve your next tiara face paint design. For example, including flowers of different colours in the design can add a more complex aspect.
Practice your tiara designs
As you can see, creating a tiara face paint design isn’t difficult, but it does take some practice. If you follow the tips and steps outlined in this guide, you’ll be a pro in no time. With a bit of practice, you’ll be able to easily create beautiful tiara face paint designs.
