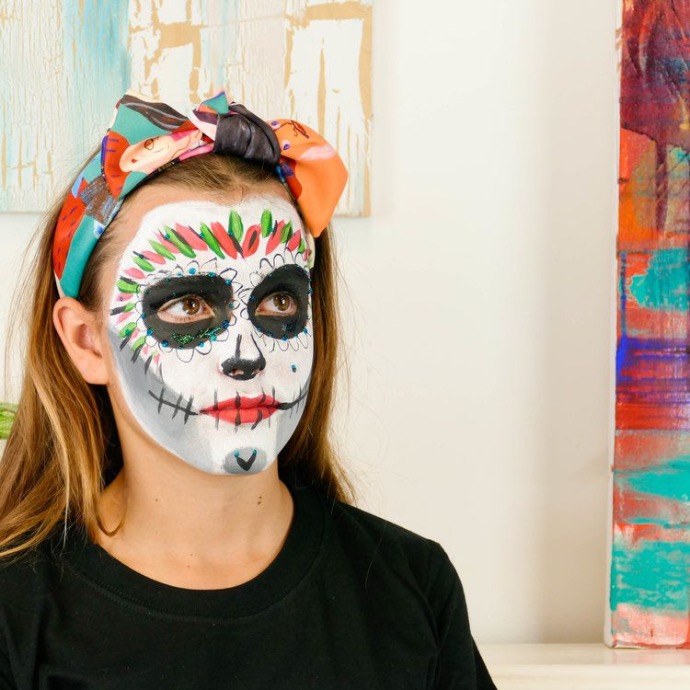
DAY OF THE DEAD FACE PAINT DESIGN
If you're looking for a fun and creative way to spruce up your Halloween look, look no further than this skull face paint project. This Day of the Dead design is perfect for those who want to add a little something special to their costume this year. This tutorial will take you through the steps of painting your face with a Day of the Dead design.
YOU WILL NEED
Before starting your Day Of The Dead face paint design, ensure you have all the necessary supplies.
- A clean, well-lit workspace
- A disposable surface to protect your workspace
- A mirror for easy visibility
- Smock or apron to protect your clothes
- Disposable gloves for cleanliness
- Mixing palette or plastic plate.
- Derivan Professional Brush Set #1
- Derivan Face & Body Paint 40ml white
- Derivan Face & Body Paint 40ml Red
- Derivan Face & Body Paint 40ml Black
- Derivan Face & Body Paint 40ml Green
- Derivan Spouncers
- 'Face Paint Set Spooky' is also available
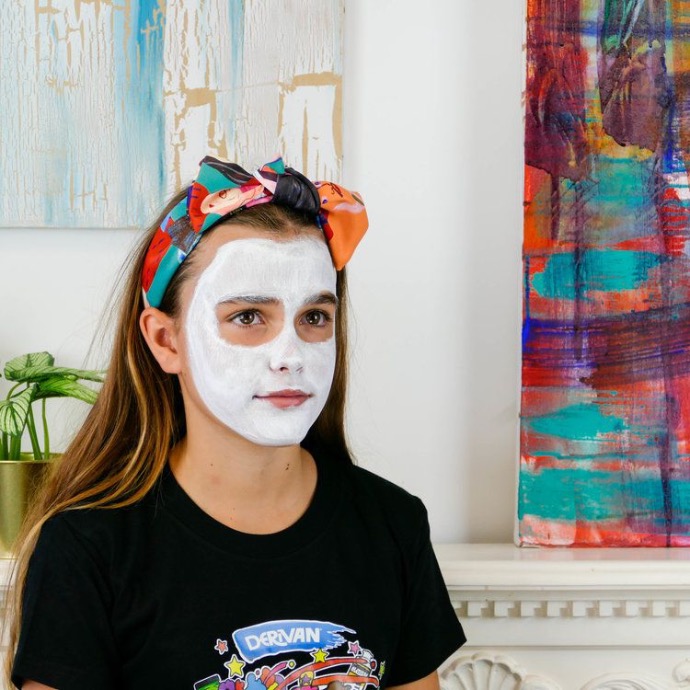
STEP ONE | COLOUR BASE
Load your sponge with white on one side of the sponge from your pallete and apply all around the face keeping the areas around the eyes and lips clear.
* Hot tip Derivan Spouncer Sets are great for this
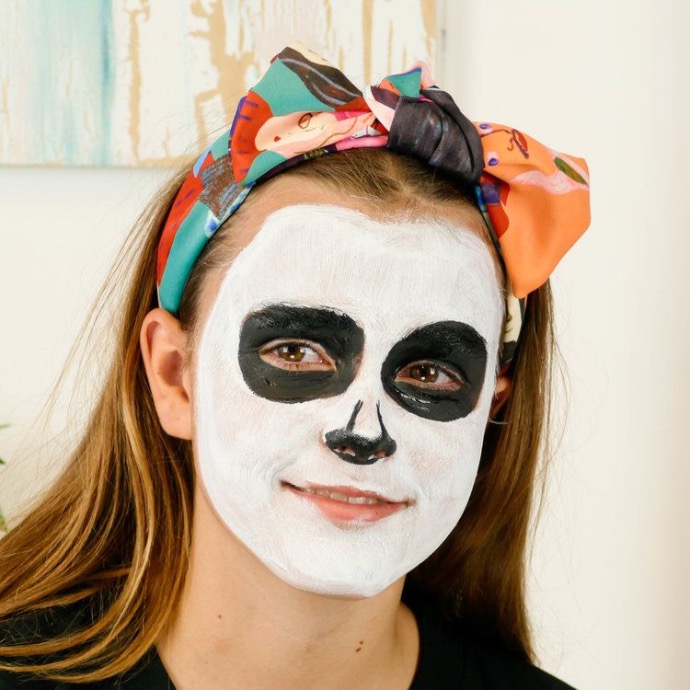
STEP TWO | EYES AND NOSE
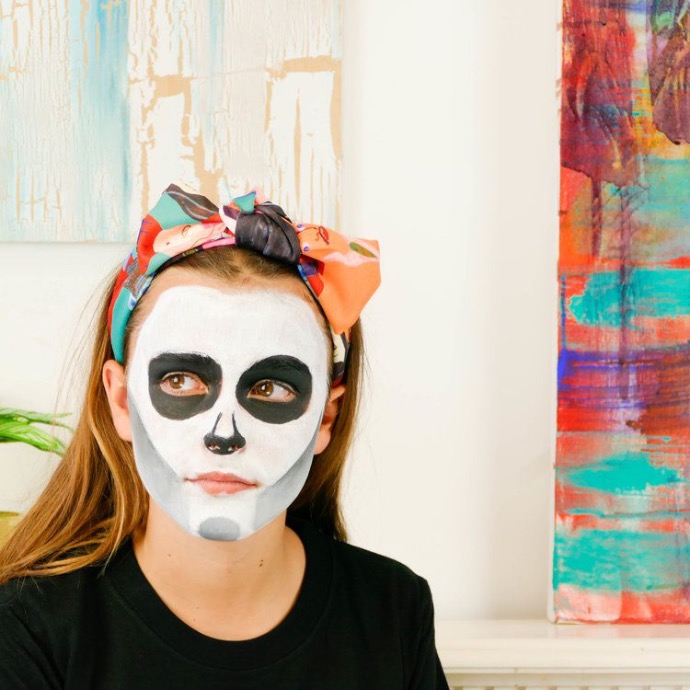
Add some black to a brush and gently paint around the eyes. Take care not to paint too close to the eyes, and ask your model to keep their eyes closed when painting on or near the eyelids. Add two thin lines on the sides of the nose & paint over the underside of the nose.
STEP THREE | FACE DETAILS
Load your sponge with white again on one side, then lightly apply some black paint with a brush to one end of the sponge. Work into the sponge until it becomes evenly grey, then apply to the check bones with the darkest edge sitting on top. Slowly drag down the side of the face. Dab a little also onto the chin.
STEP FOUR | COLOUR
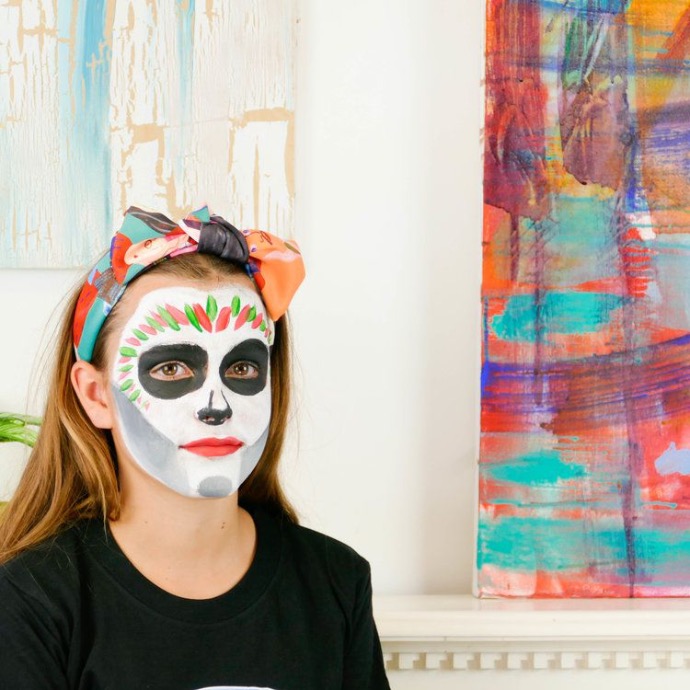
Load the liner brush (from the brush set) with Red or green and paint short lines around the ridges of the eyebrows in the middle of the forehead, as well as applying red to the lips.
STEP FIVE | FINISHING TOUCHES
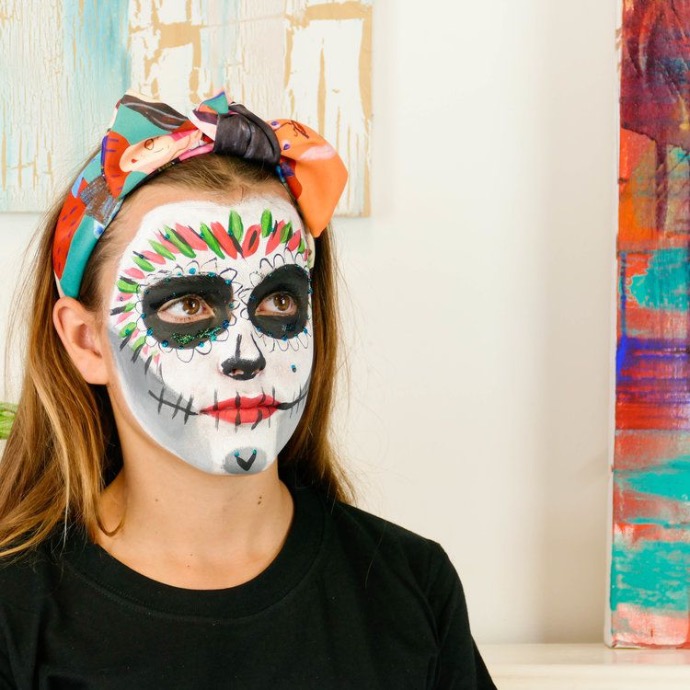
You can now finish off your design by using the liner brush to apply a petal design around the outside of the eye area, as well as jagged lines over the mouth and sides.
Tips to make your next day of the dead face paint design even better
There are plenty of ways to improve your next day of the dead face paint design. For example, using new colours and adding more black details and patters around the face create a more complex design.
Practice your day of the dead designs
As you can see, creating a day of the dead face paint design isn’t difficult, but it does take some practice. If you follow the tips and steps outlined in this guide, you’ll be a pro in no time. With a bit of practice, you’ll be able to easily create perfect day of the dead face paint designs.
