Create Stunning Gelatin Printmaking Art with White Ink Block Ink on Black Card
Unleash your creativity with a distinctive and captivating art form! Gelatin printmaking is a fantastic technique that enables you to craft beautiful monoprints. In this guide, we'll take you through the process of using white block ink on black card to create striking, high-contrast images. Additionally, we'll provide tips on how to incorporate hand-colouring, layering, and collage techniques to give your prints a sense of depth and dimension. With our step-by-step instructions, you'll be able to unlock the limitless potential of gelatin printmaking and turn your artistic vision into a real masterpiece. So why wait? Begin your journey today and discover the captivating art form of gelatin printmaking!
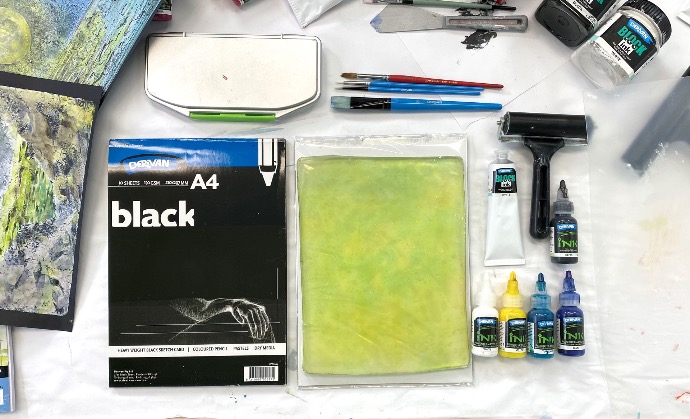
How to Create Eye-Catching Gelatin Mono Prints
You will need:
Gelatin printing plate
- White block printing ink
- Brayer or roller
- Black cardstock
- Derivan Acrylic Inks in various colours
- Paintbrushes
Scissors
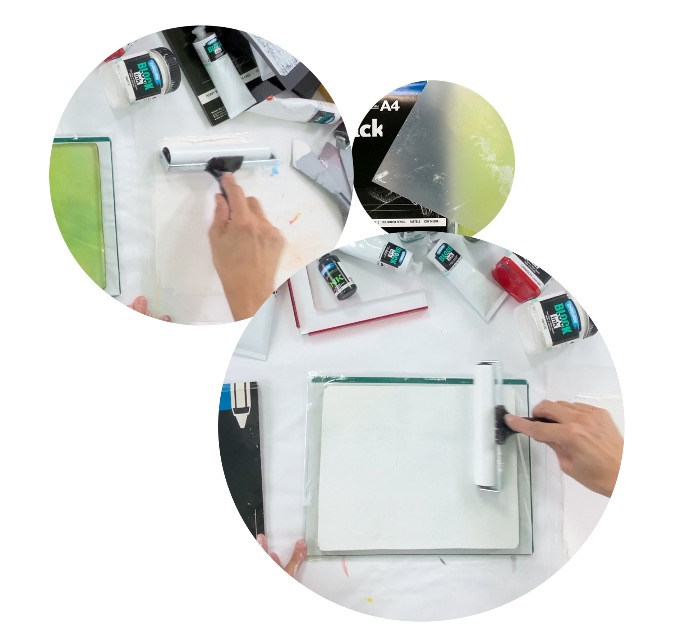
Step 1: Prepare Your Supplies
Before printing, it's essential to have all your supplies ready and within reach. This will make the printing process smoother and more efficient. Lay out your gelatin printing plate, white block printing ink, brayer or roller, black cardstock, acrylic paint in various colours, paintbrushes, scissors, and collage materials such as magazine cutouts or textured paper on a clean work surface. Make sure you have enough space to spread out and move around comfortably. Double-check that you have all the supplies you need before beginning so you don't have to stop and search for missing items in the middle of the process. Once you have everything set up, you can create eye-catching gelatin monoprints.
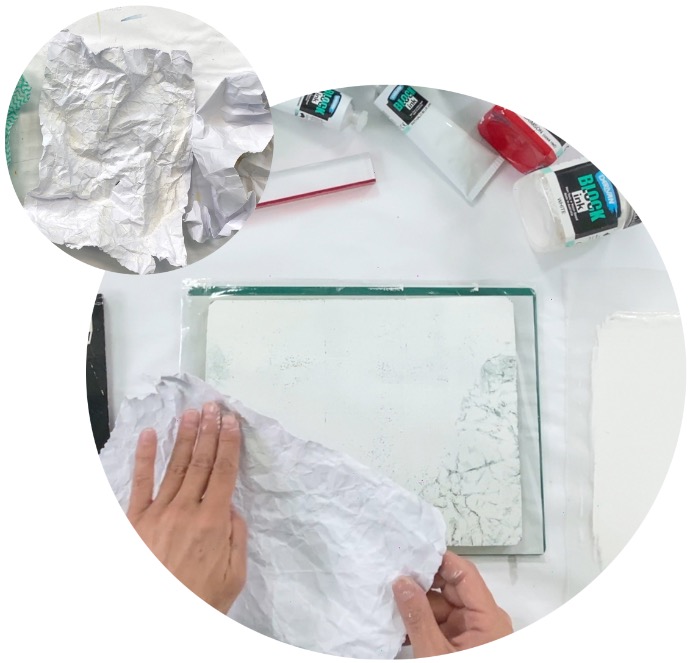
Step 2: Inking Up with the Brayer
Now that you have your materials ready, it's time to start inking up your gelatin plate. You'll want to ensure you don't use too much ink, which can lead to smudging and unclear prints—applying the white block printing ink to your gelatin plate using a brayer or roller, using even pressure and smooth strokes.
As you roll the brayer over the plate, you'll hear a satisfying Velcro-like sound, which indicates that the ink is adhering to the surface. Once you've achieved a thin and uniform layer of ink on the plate, you're ready to create your print. After inking up, grab a piece of crumpled paper and gently dab it onto the plate to lift off some of the ink, as shown in the reference picture. This technique will create a textured foreground for your landscape print.
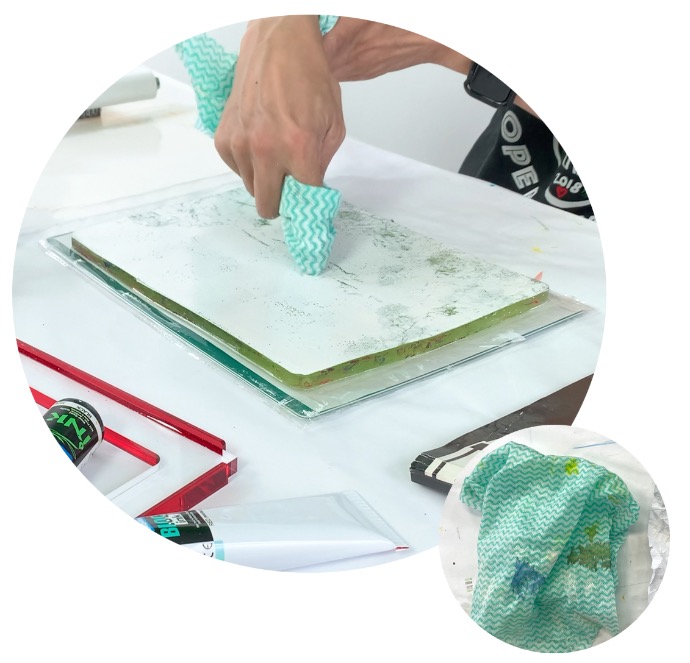
Step 3: Adding Details and Texture
Once you have your inked-up gelatin plate, it's time to start creating your prints! One way to add texture and interest to your monoprints is by incorporating plant life and hand-cut stencils.
Start by collecting various plant materials, such as leaves, flowers, and grasses. You can also use lace, mesh, and paper cutouts as stencils.
To create a plant print, press your chosen plant material onto the inked-up gelatin plate, then lay a piece of paper over the top and smooth it down with your hand or a brayer. Peel the paper back to reveal your print!
Step 4: Transferring the Ink to Paper
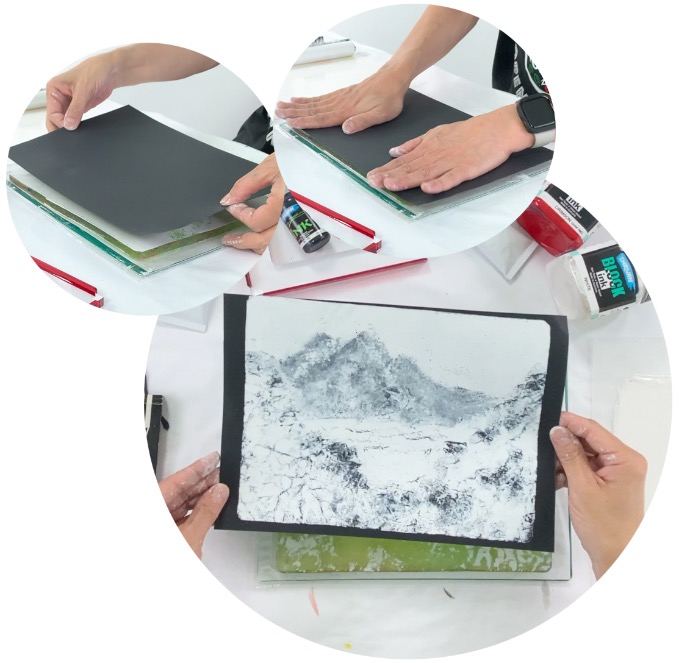
After adding details and texture to your print, it's time to transfer the ink to paper. First, lay a piece of black paper over the inked plate. Make sure the paper is straight and centred over the plate. Using your hands, gently but firmly press down on the paper and burnish it onto the plate. This process ensures that the ink will transfer evenly onto the paper.
Next, use one hand to hold the paper in place while the other hand carefully peel it off the plate. Take your time with this step, as avoiding any accidental smudging or tearing of the paper is important.
Once the paper is removed from the plate, you'll see the final image transferred onto the paper. The high contrast between the white ink and black paper will create a striking and visually captivating print.
Step 5: Hand Painting with Derivan Inks
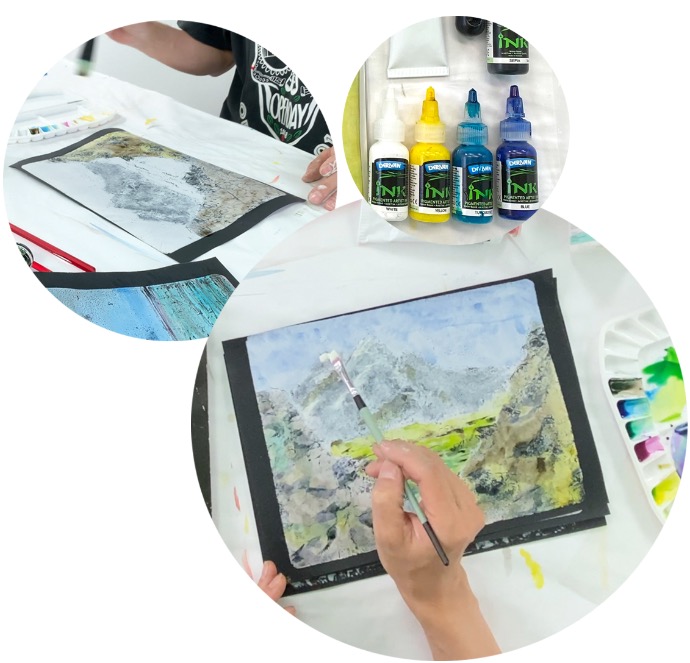
After creating your gelatin print, it's time to let it fully cure. Once the print has cured, you can begin hand painting with Derivan inks to add even more depth and dimension to your artwork. In this example, we've used white, yellow, turquoise, and blue Derivan inks to enhance the print.
Use a paintbrush to carefully apply the inks to the print, working in layers and building up the colours as desired. The inks will blend beautifully with the white ink of the image, creating a stunning visual effect. Take your time with this step and experiment with different colour combinations to bring your print to life. Once you're satisfied with the final result, you'll have a truly unique and captivating work of art to display and enjoy.
Step 6: Admiring Your Handiwork
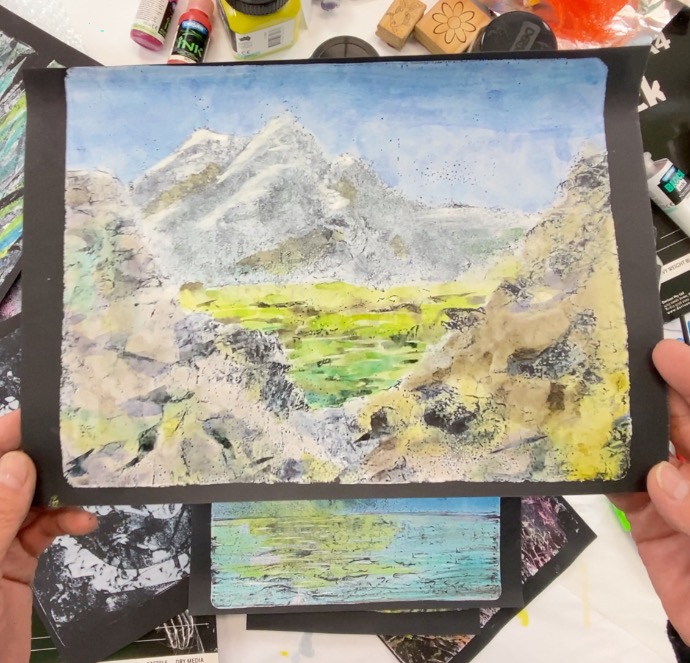
Congratulations! You've completed the gelatin printmaking process and added your own unique touch with hand painting. Now it's time to sit back, relax, and admire your handiwork. Take a moment to appreciate the textures, colours, and patterns you've created with this wonderful art form.
Consider framing your print to display in your home or giving it as a thoughtful and personalised gift to someone special. Gelatin printmaking is a versatile and rewarding art form that offers endless possibilities for creativity and expression. So keep experimenting and have fun!
