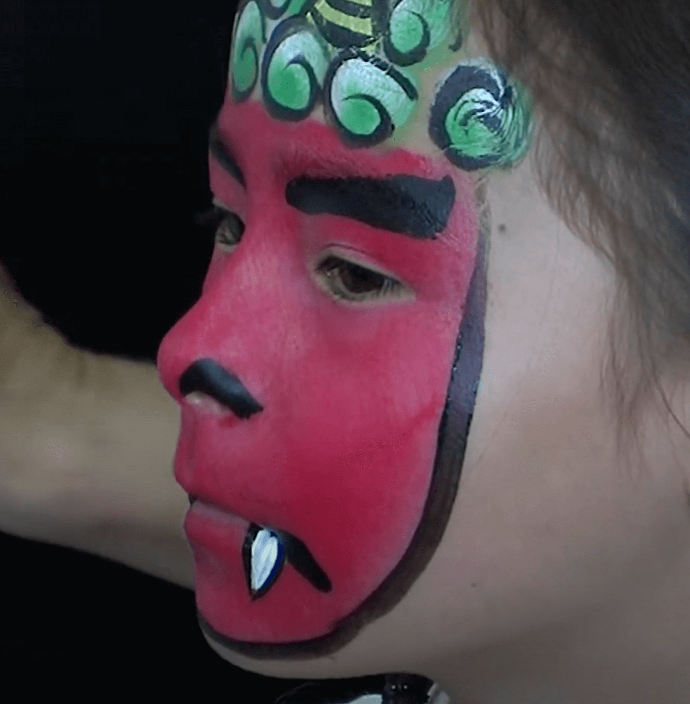
JAPANESE FACE PAINT DESIGN (SETSUBUN ONI)
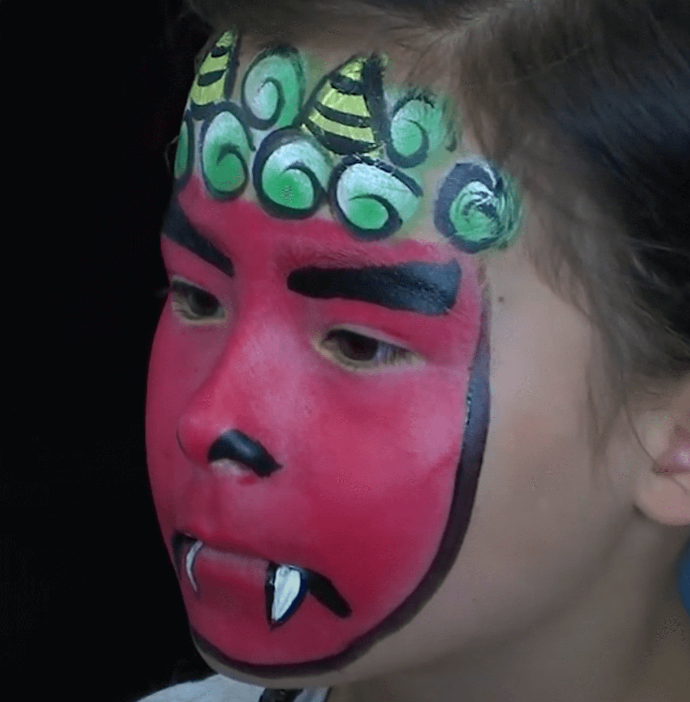
This face paint look is inspired by the Japanese Setsubun festival, often referred to as the bean-throwing festival, which is a traditional Japanese festival which translates to "seasonal division", and during this festival, rituals are held to drive away evil spirits and welcome good fortune. Many rituals are customary for this festival, including the event of throwing soybeans at adults dressed as demons, or Oni, such as the one depicted by this face paint design.
YOU WILL NEED
Before starting your Japanese Setsubun face paint design, ensure you have all the necessary supplies.
- A clean, well-lit workspace
- Derivan Professional Brush Set #1
- A disposable surface to protect your workspace
- A mirror for easy visibility
- Smock or apron to protect your clothes
- Disposable gloves for cleanliness
- Green face paint
- White face paint
- Black face paint
- Red face paint
- Yellow face paint
- Spouncer Set
- Face paint brush set
Superheroes face paint set (Oni are not considered heroes, though this set has all the necessary colours for this design)
You're ready to begin when you’re sure you have all the necessary tools!
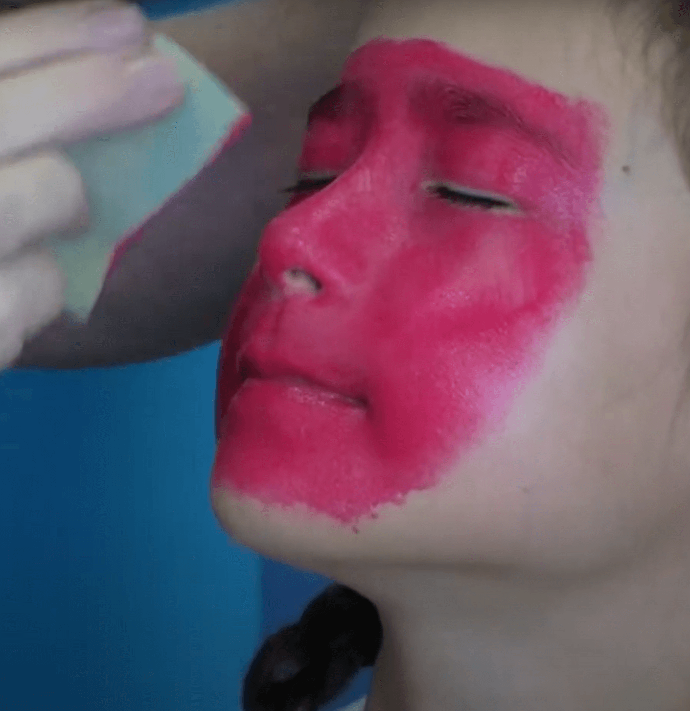
STEP ONE | RED BASE
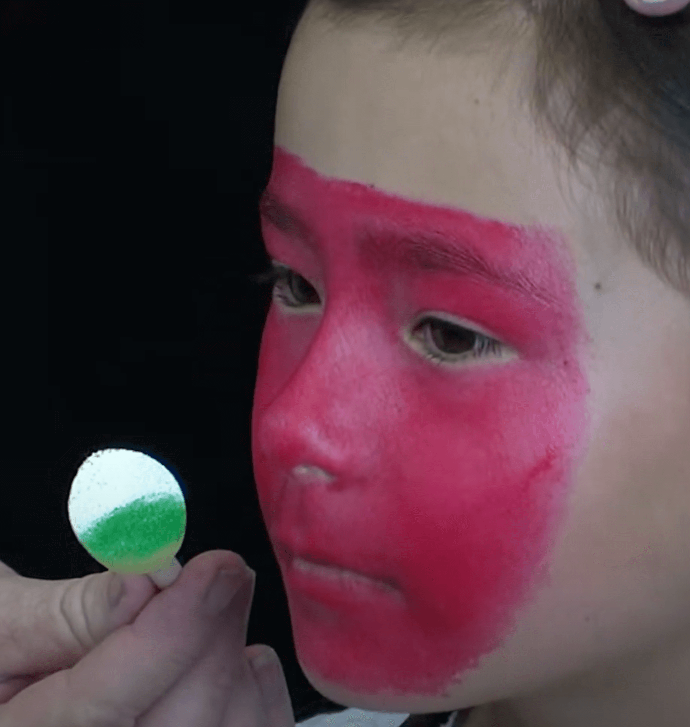
Using a sponge, gently dab red paint across the face, avoiding the edges, and trying the create a straight edge across the forehead with the paint.
STEP TWO | PREPARE THE SPONGE
Prepare as pouncer by putting white paint on the surface, and then applying green paint over half of this.
STEP THREE | SETSUBUN HAIR
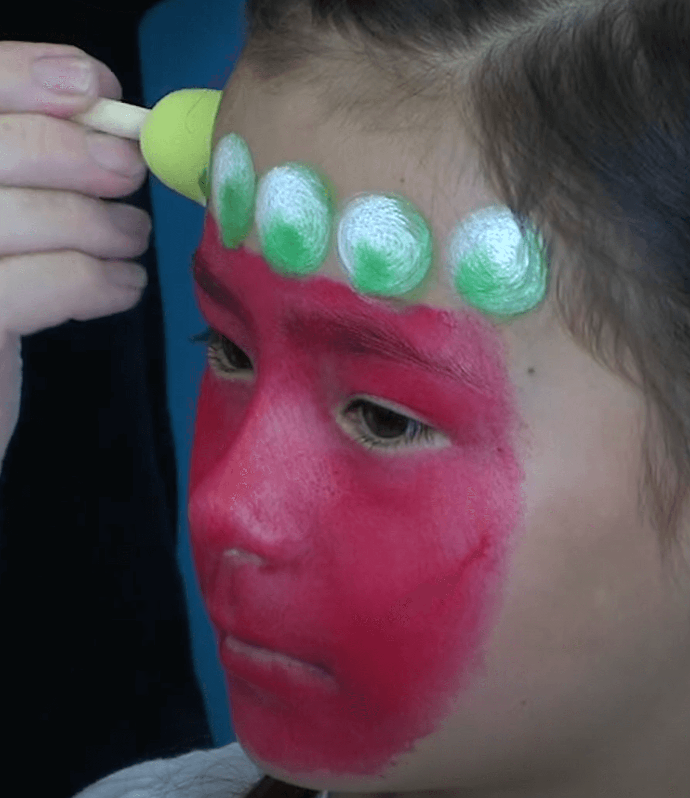
To create the swirls that make the hair, place the spouncer against the forehead and spinning it in a circle, trying not to move it from it's position on the skin. Use this technique to make a row of roughly five circles above the edge made with the red paint. Above this row, create another three circles, leaving space between them.
STEP FOUR | HORNS
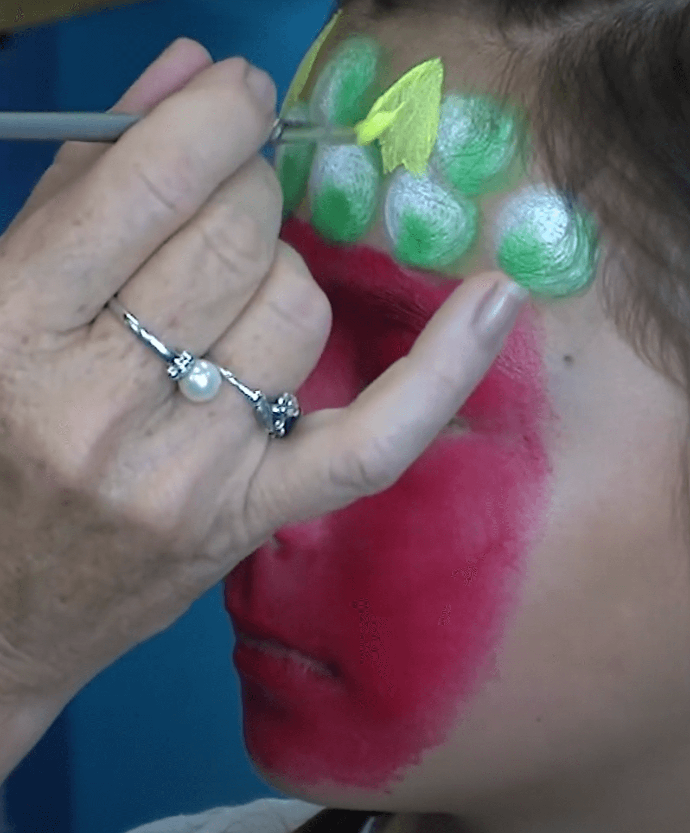
Using a round brush and yellow paint, create two triangles between the circles on the top row of the hair. Fill this in with yellow paint to create horns.
STEP FIVE | BLACK DETAILS
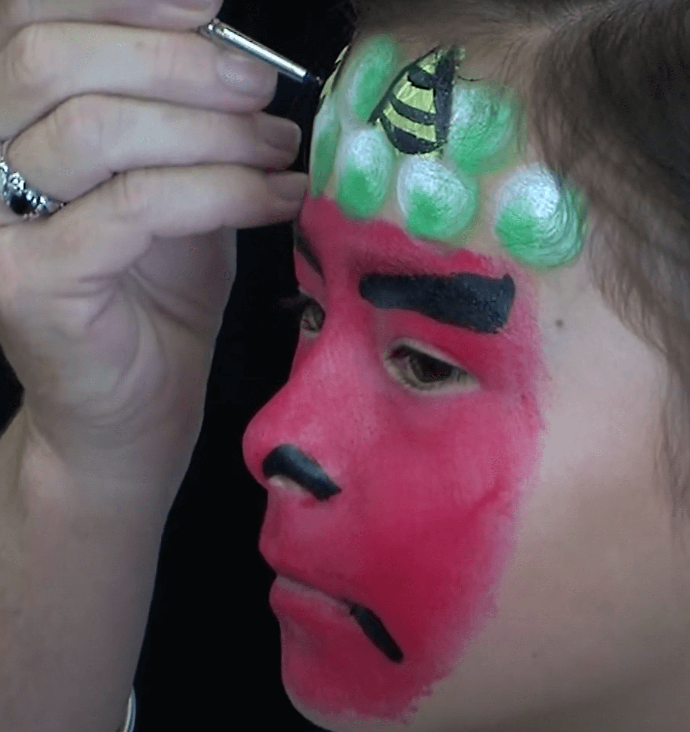
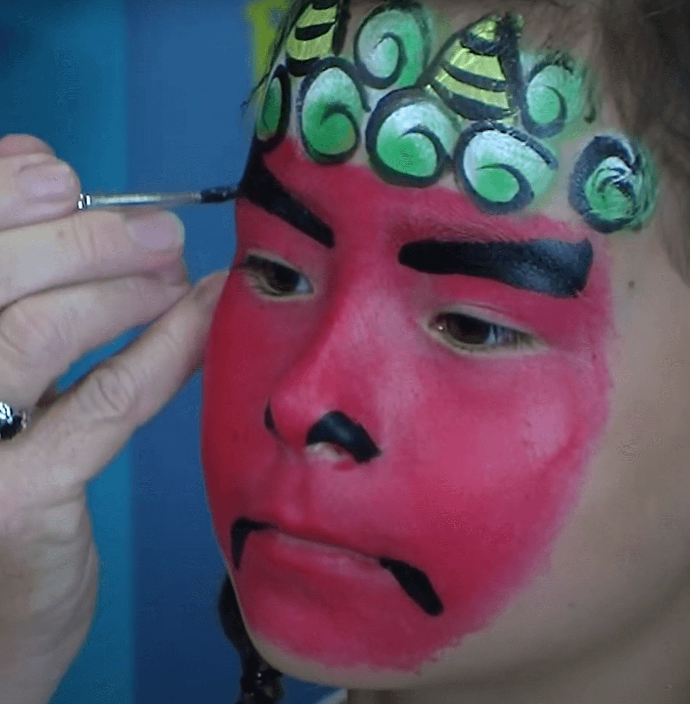
Using a round brush and black paint, create eyebrows for the design by making a line that starts just below the eyebrow above the inner corner of of the eye, and ends just above the tail of the eyebrow. Thicken this line and widen it towards the outside of the face.
Fill in the areas just above the nostrils, and paint lines that extend downwards slightly from the outer corners of the mouth.
To complete the black details, outline the yellow horns on the forehead, and draw curved lines horizontally across the horns to connect the two sides of the outline.
STEP SIX | HAIR CURLS
For each circle on the forehead, use a round brush loaded with black paint to create a spiral shape.
STEP SEVEN | OUTLINE
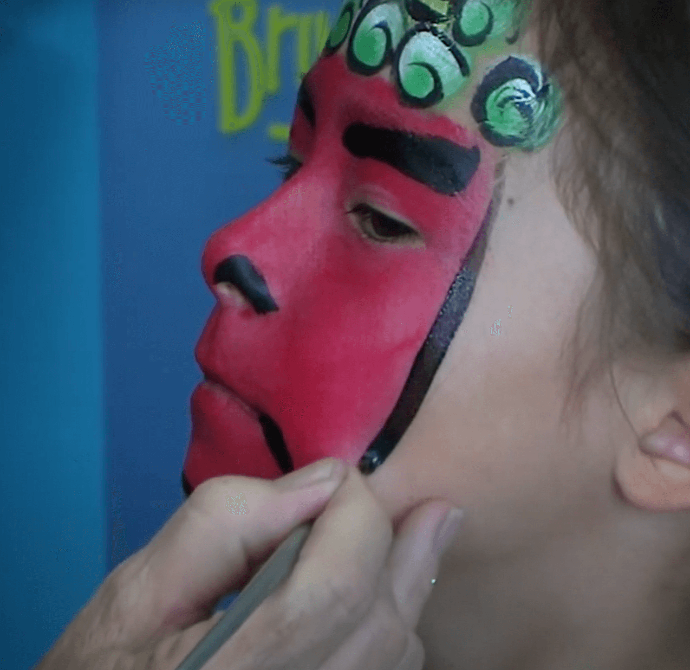
Using this same round brush loaded with black paint to outline the red base, creating a mask effect.
STEP EIGHT | TEETH
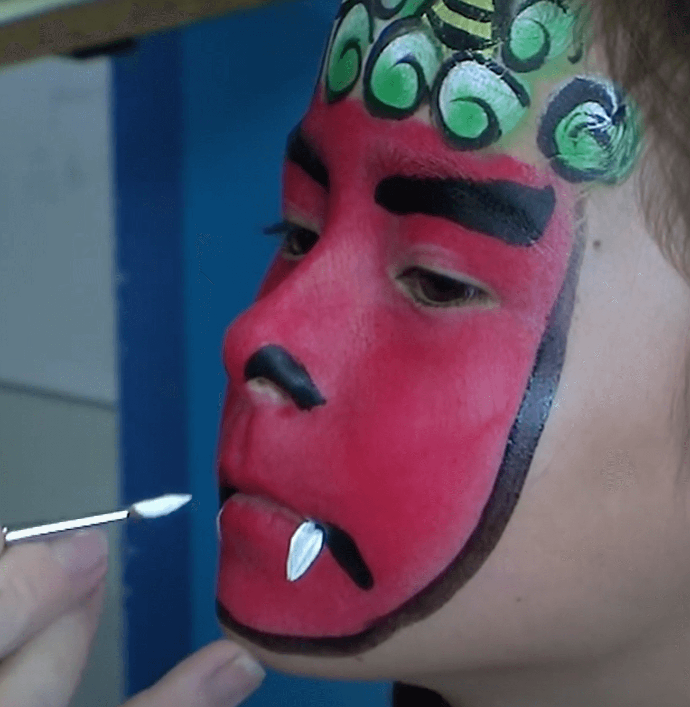
Using a round brush and white paint, create small downward lines from the corners of the mouth, to make two teeth protruding from the mouth. These lines should be thicker at the top, and then thin to a point.
