UNICORN FACE PAINT DESIGN
With a few simple steps, you can master unicorn face paint and turn into a mythical creature using Derivan face paints. In this project, we've made it easy to create a magical unicorn character with a few simple Derivan face paint supplies that we have designed to be suitable for fairytale and unicorn-themed parties!You can have a great time at a party using this fantastic unicorn face paint design. So easy and quick start by applying white face paint as the foundation, adding in the blues and pinks, and finishing with blue face paint to punch out your design and gives it definition.
YOU WILL NEED
Before starting your unicorn face paint design, ensure you have all the necessary supplies.
A clean, well-lit workspace
A disposable surface to protect your workspace
A mirror for easy visibility
Smock or apron to protect your clothes
Disposable gloves for cleanliness
OR
OR
OR

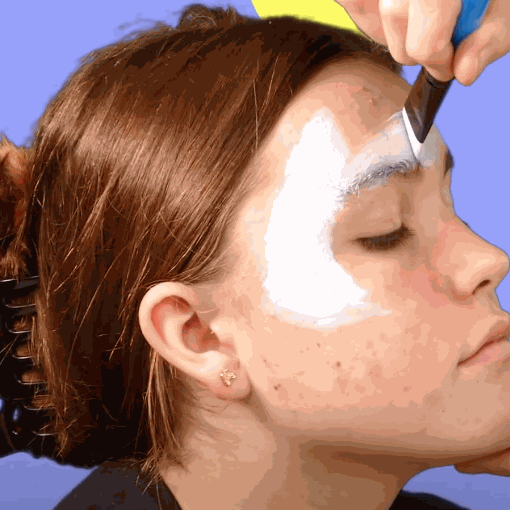
STEP ONE | UNICORN BASE COLOUR
The first step is the white background which will make your face paint design like the shape of a unicorn. The white paint also helps to make the look colours dramatic. Use the big flat brush to paint the shape of the unicorn on the forehead. And the ears to the side, you don't have to be overly precise as long as you establish the shape. Use this picture as a guide
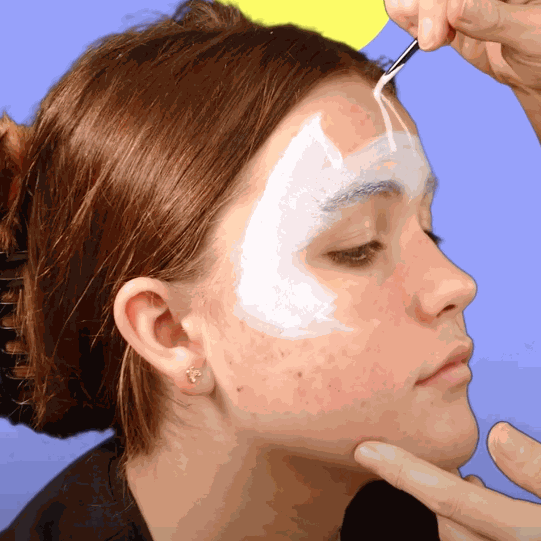
STEP TWO | HORN BASE
Then take the smallest round from the brush set loaded with the white face paint to draw in the unicorn horn shape; again does not have to be exact. The key here is not to worry about it looking perfect.
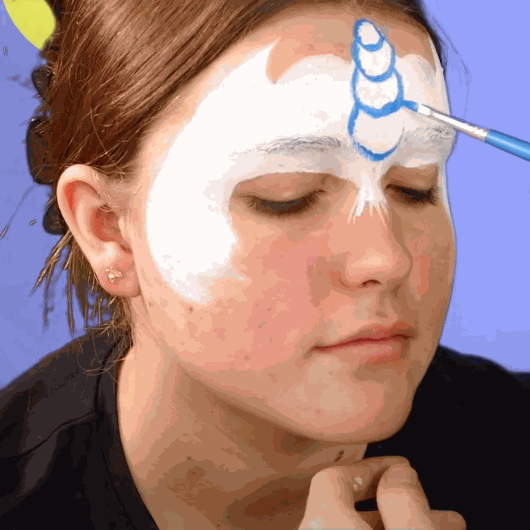
STEP THREE | HORN OUTLINE
It's time to start doing some detail with the fluro blue, putting the first bit of the shape of the unicorn horn. As you can see, the shape is straightforward, and the simplest way to depict it is to begin with the tiniest circle and then draw larger ones. once you have done that, mix some fluro blue with the white and colour in the circles.
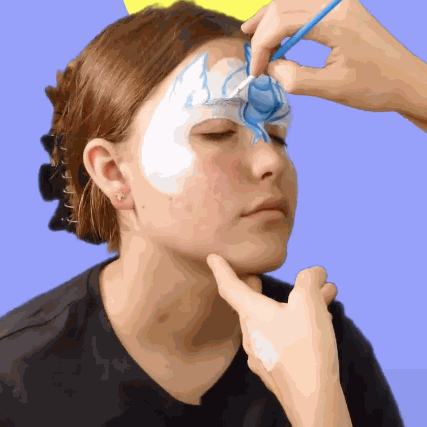
STEP FOUR | FUR DETAIL
In this step of the unicorn face paint design, you will need to mix up some more light blue using the fluro blue and white * mix up a good amount as you will use this mix in the next step. Now is the time to paint the unicorn ears and some extra curved decoration lines to make the design more attractive. The best brush for this is the small round brush.
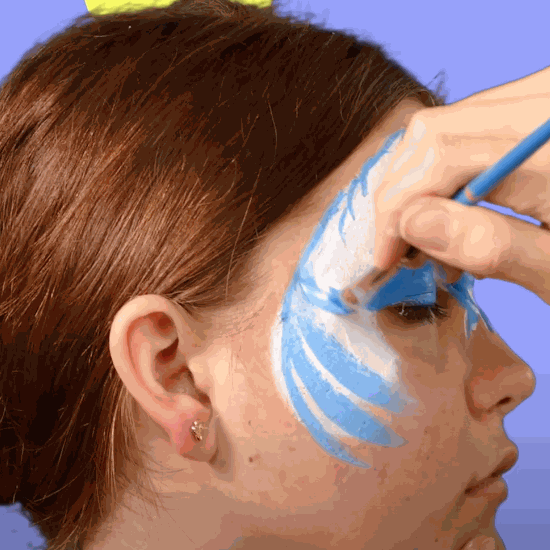
STEP FIVE | UNICORN MANE
In this step, you will need to use the bigger round brush to put some stripes down. Before you do this, practice on a scrap piece of paper. To get the shape of the brush stroke correct, notice how the line is thinner at the top than at the bottom. Once you have completed the stripes, paint the eyelids blue as well follow the shape of the eyelid and carry the shape out into a wing shape.
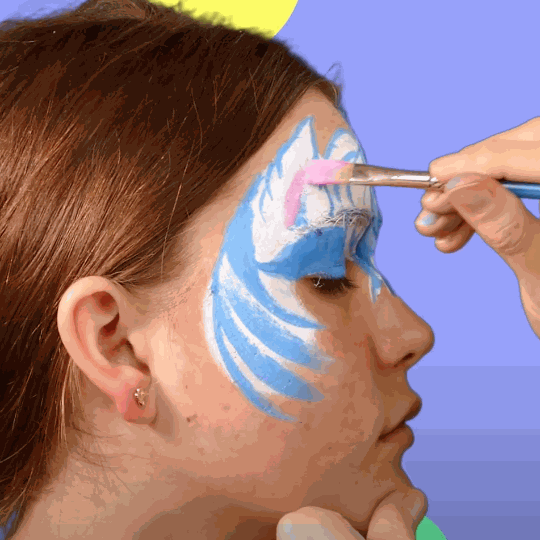
STEP SIX | UNICORN EARS
You will need white and red acrylic face paint for this one. Start with a few drops of red face paint to create a mix of a soft baby pink colour. With this mix, you need to colour in the ears of your unicorn.
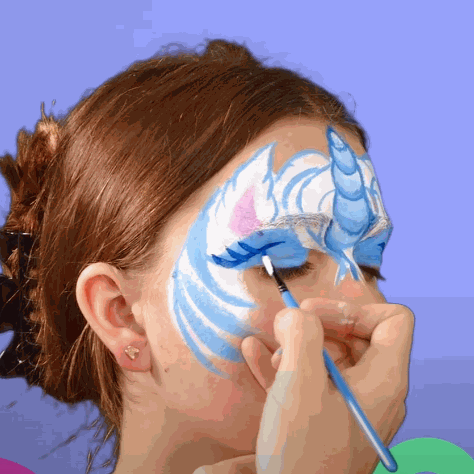
STEP SEVEN | EYE DETAILS
This unicorn design needs some detail around the eyes, specifically the eyelashes, to give it a cute factor. Use the small round brush loaded with blue. Ensure your brush is loaded well to provide you with a confident line.
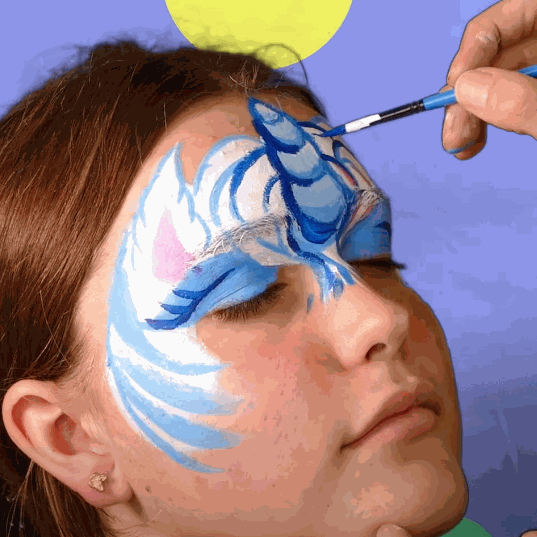
STEP EIGHT | FINISHING TOUCHES
The last step is to come in and add extra detail with the blue. This will give the design some extra pop and dimension.
Be sure to come in with a light hand and take your time. You can always add more, but you can’t take it away!
Now you have a cutie-pie unicorn face!
Tips to make your next Unicorn face paint design even better
There are plenty of ways to improve your next Unicorn face paint design. For example, making the eyelashes oversized for a child will make the design appear cuter, or using different colours like pink for the outline and fur can make a cool variation of this design.
Practice your Unicorn designs
As you can see, creating a Unicorn face paint design isn’t difficult, but it does take some practice. If you follow the tips and steps outlined in this guide, you’ll be a pro in no time. With a bit of practice, you’ll be able to easily create beautiful unicorn face paint designs.
